Installation and updates
System requirements
To be able to install Guru Pro, your server PHP and MySQL environment will have to meet these specifications
| File | Value | Minimum | Recommended |
|---|---|---|---|
| php.ini | max_execution_time | 30 | 300 |
| php.ini | max_input_time | 30 | 300 |
| php.ini | memory_limit | 128M | 1024M |
| php.ini | post_max_size | 20M | 4096M |
| php.ini | upload_max_filesize | 20M | 4096M |
| my.cnf | connect_timeout | 10 | 120 |
| my.cnf | wait_timeout | 10 | 120 |
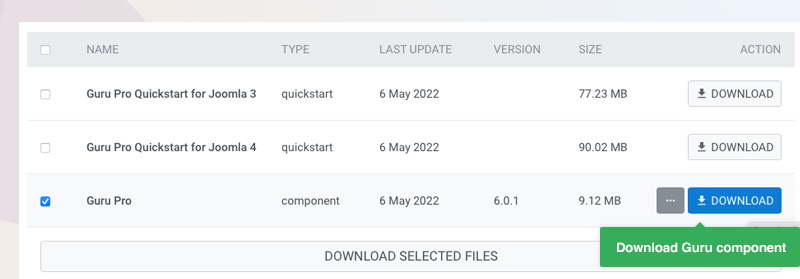
Download Packages
Guru Pro includes component and additional plugins and modules, it also has quickstart packages for Joomla 3 and Joomla 4 to start a new project faster that replicate the Guru Pro demo site on your server.
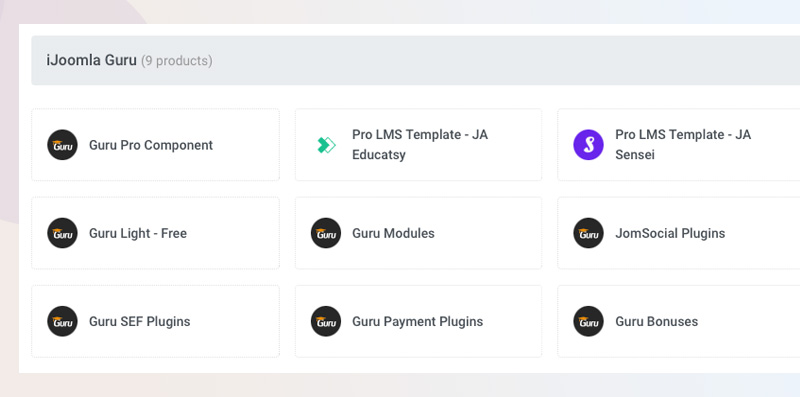
We also provide pro templats for Guru Pro - JA Sensei and JA Educatsy.
- Guru Pro component
- Guru Pro Quickstart for Joomla 4
- Guru Pro Quickstart for Joomla 3
- Guru Pro LMS templates
- JA Sensei
- JA Educatsy
- JA Coach - coming soon
- Guru Pro payment plugins
- Paypal Smart Button
- Stripe SCA
- 2checkout
- PayPal Pro
- Authorize
- Guru Pro modules
- Guru Categories Module
- Guru Search Module
- Guru Courses Module
Install Guru Pro
Quickstart installation
Quickstart installation allows you to replicate the demo site to your server with template, Guru Pro component, modules, plugins and demo content. It is suitable when you start a new project.
If you are new to Joomla, follow the tutorials:
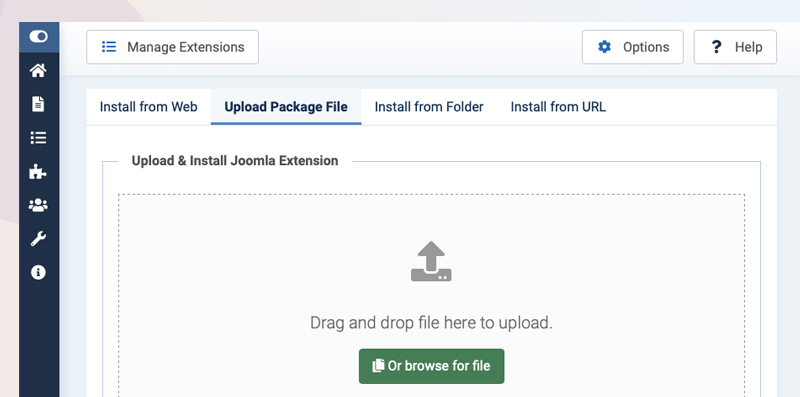
Manual installation
The installation of Guru is easy as any other Joomla extension.
Download Guru Pro component from HERE
Joomla 3: From your site admin dashboard, go to Extension > Manage > Install > Upload the Guru zip file, the installation process will start.
Joomla 4: From your site admin dashboard, go to System > Install > Extensions > Upload the Guru zip file, the installation process will start.
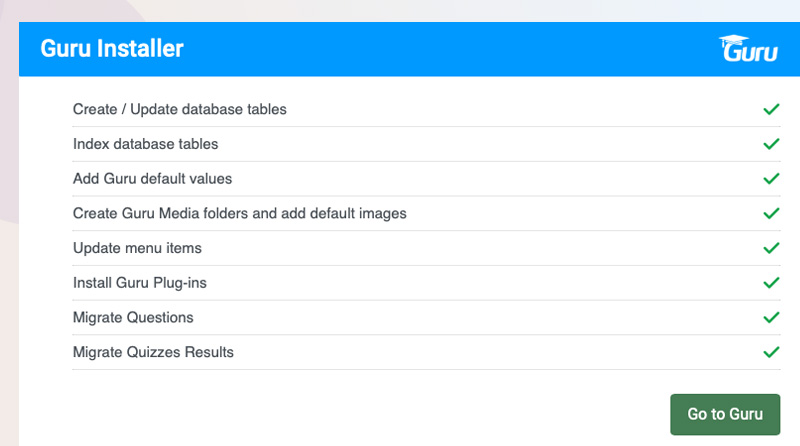
All the process is automatically done. From the creation of a database to migrate the quiz process
You can install Guru payment plugins and modules in case you want to use.
Guru payment gateways:
- Paypal Smart Button
- Stripe SCA
- PayPal Pro
- 2checkout
- Authorize
- Payfast Plugin
Guru modules:
- Categories Module
- Courses Module
- Search Module
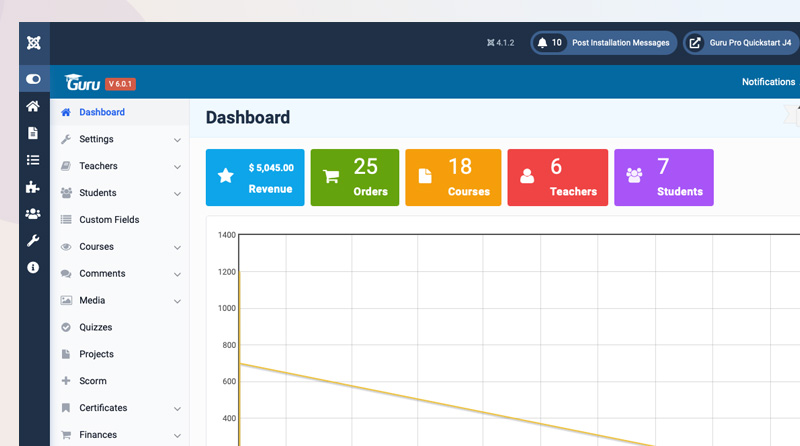
All done. You can now access the Guru Dashboard to create your courses and sell it.
Upgrade instruction
Before doing upgrade, please make sure make a backup.
To upgrade new version, download new version and install, new version will override the old version.
Getting started
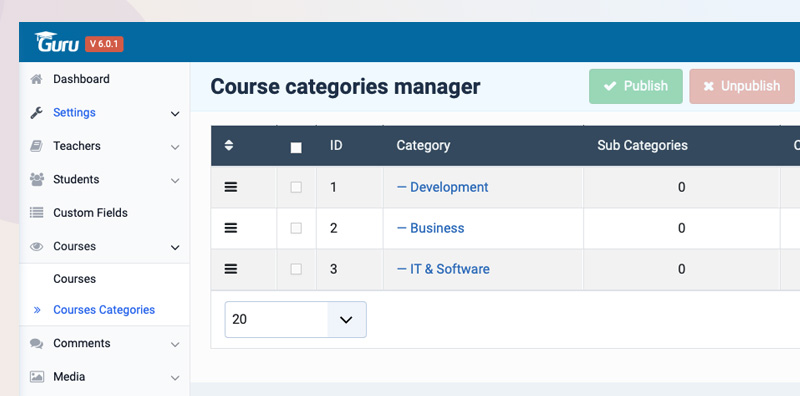
1. Create categories
Before creating course, you should create categories to organize your courses better. Open courses > categor
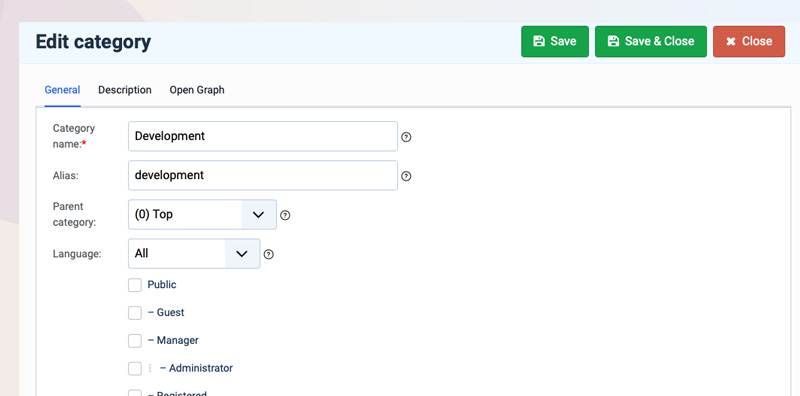
Create new category page and full fill the information: title, parent category, category description, category image, icon, and Open Graph meta data.
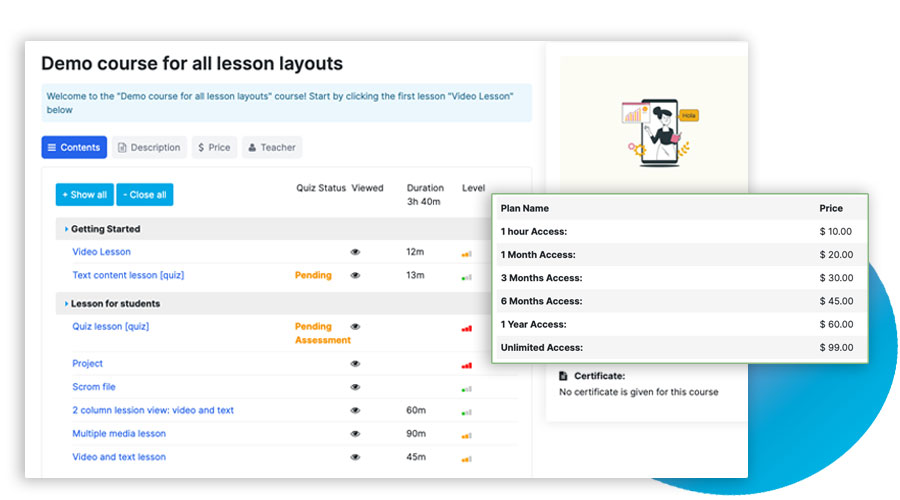
2. Create course
On a new Guru installation, we supplied a test course that already shows under Guru course and some Pre-built menu items that make things easy for new users to see how the course is set up.
Each course has 2 main important content: course information and course lessons
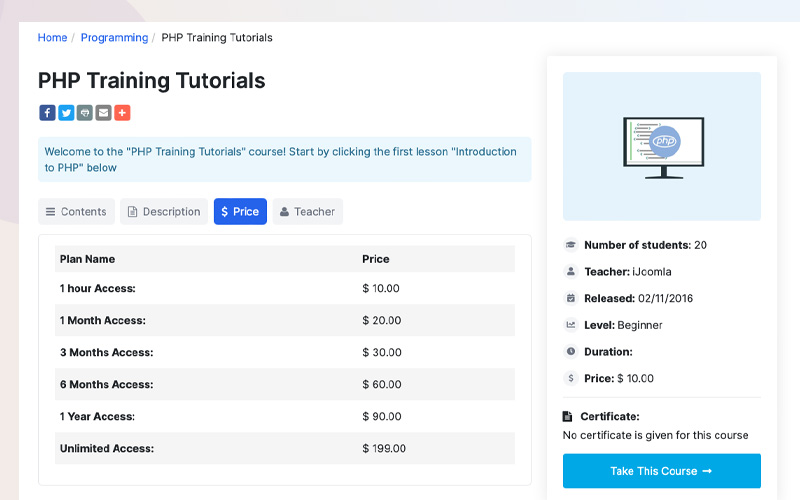
Course information
The course information gives you an overview on how the course is about, description, pricing, teacher, category and many more.
Simply update the content in the course detail setting page
The course information includes:
- General
- Description
- Cover/Avatar
- Exercise files
- Pricing/Plans
- Publishing
- Meta Tags
- Requirements
- MailChimp
- Purchase Email Template
- Custom Certificate
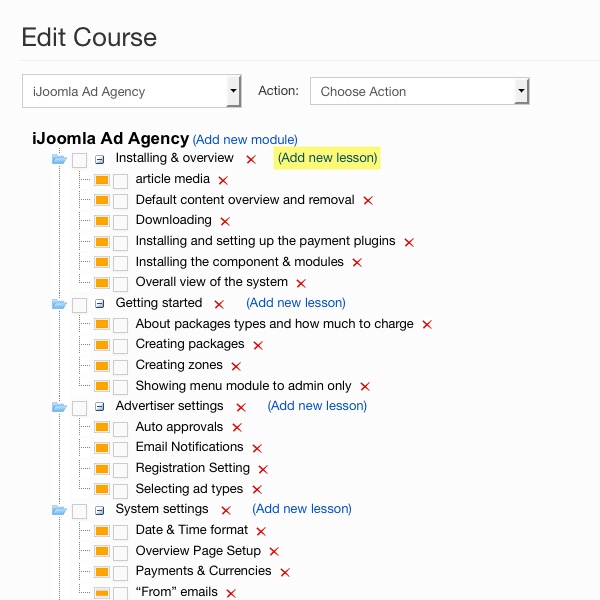
Course table of content and lessons
Lessons contain the actual learning material, whether it's a video, text, document, quiz, URL, file or other type of media.
To add a lesson, click on "Add Lesson" on the course tree.
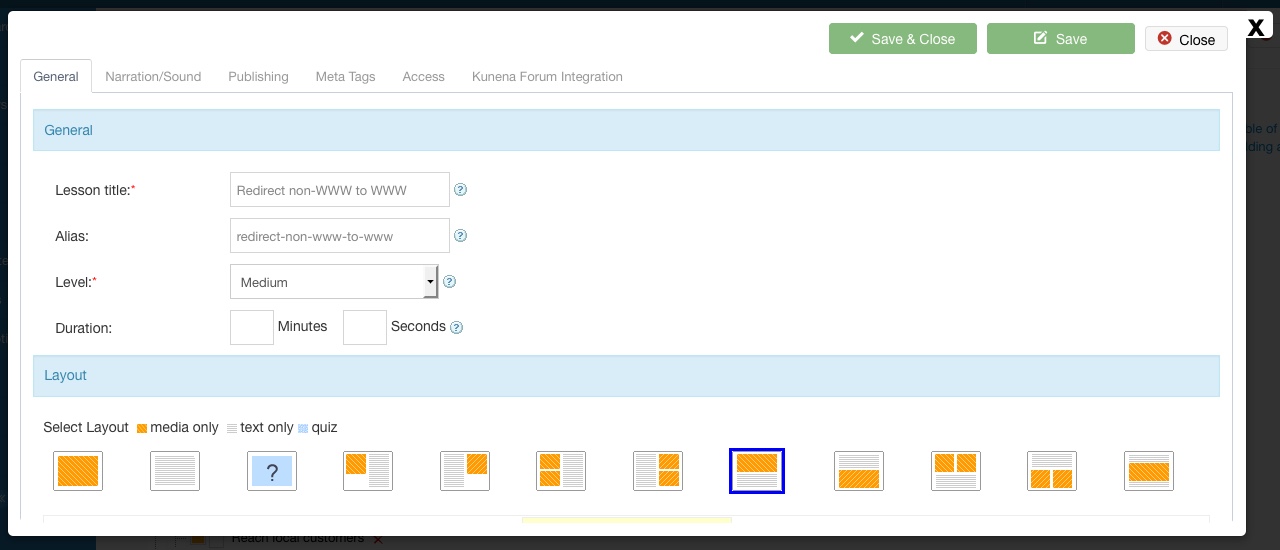
A Lightbox Style Pop-Up Will Open with Four Tabs:
- Add lesson title and alias
- Set the difficulty level
- Choose who can access this lesson (visitors, registered users, students).
- Choose one of 12 available layouts and select media that is the course lesson main content
- Set duration.
- Other settings: Lesson description, sound, publishing and access.
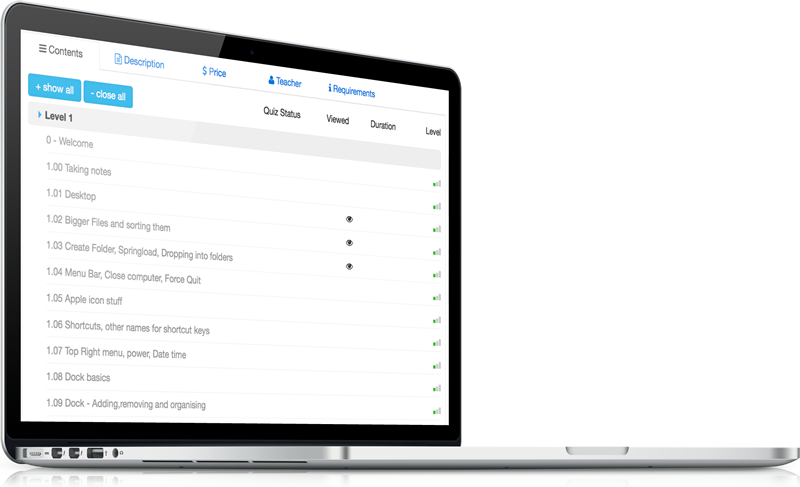
Course table of content Course lessons
Showing courses to your users
Guru supports multiple menu types and modules to show Guru contents to users. Following are the main pages:
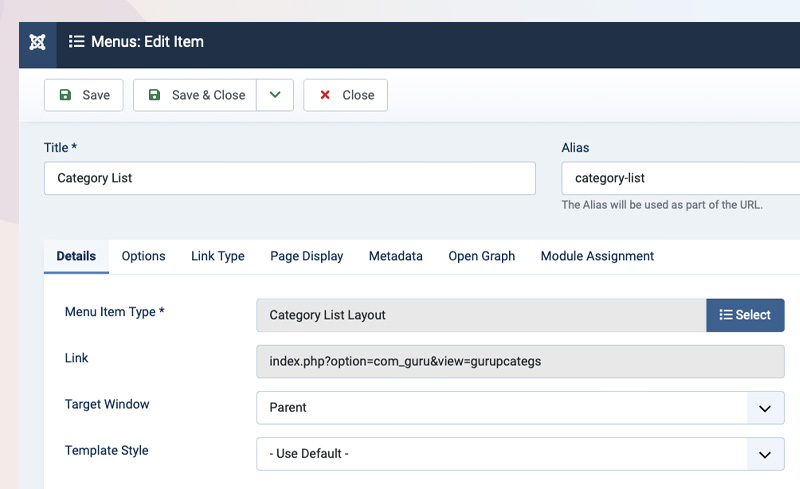
Course categories page
This page displays list of categories in grid view or tree view.
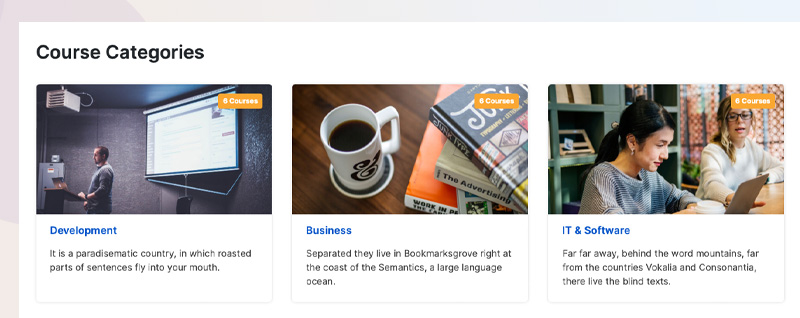
Create a new menu item, select the Guru Pro > Category List Layout.
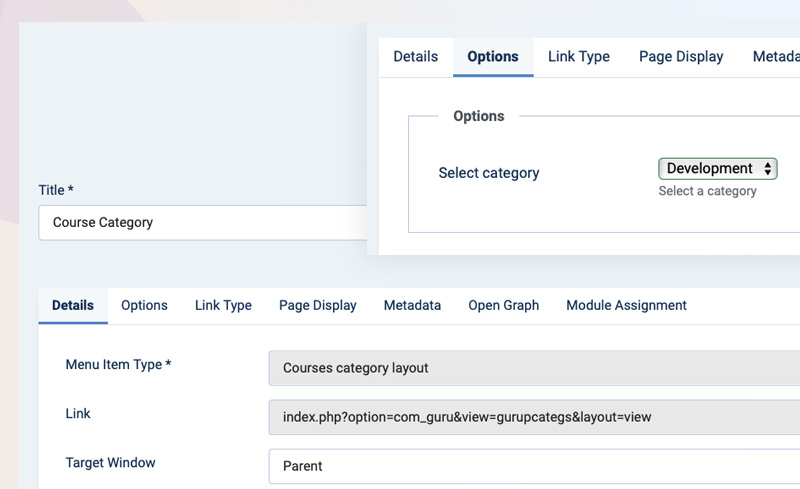
Course category page
This page displays list of courses from a category in grid view or list view.
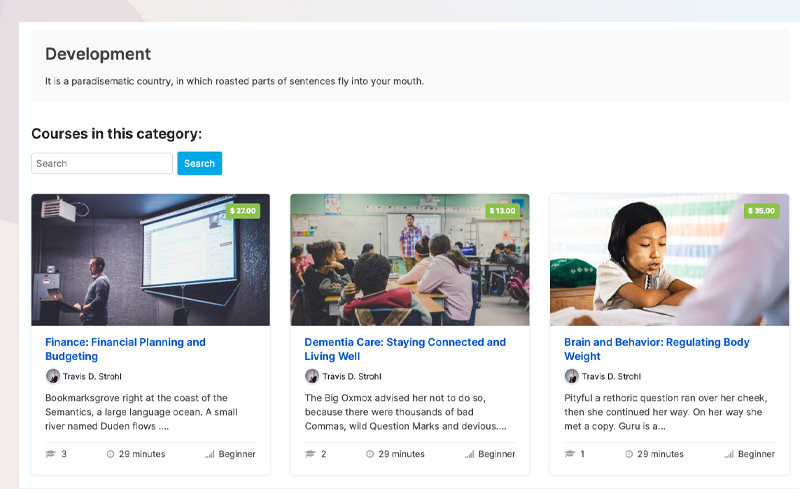
List view:
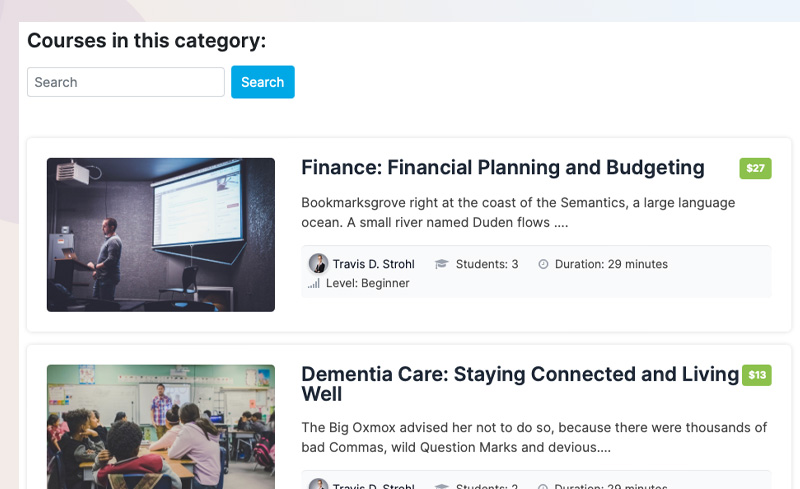
Create a new menu item, select the Guru Pro > Courses category layout.
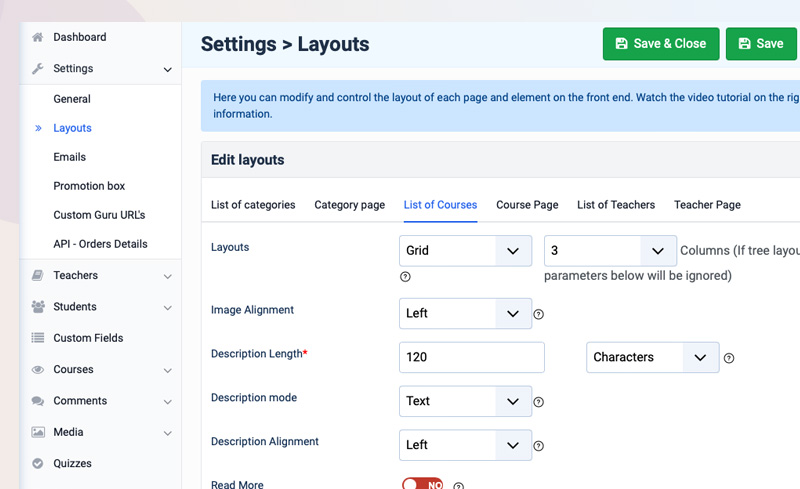
You can configure the page layout in the Guru > Settings > Layouts > List of courses.
More views:
Guru supports many menu items to show content in front-end.
Global settings:
The setting tab consists of different options to set up the default settings of Guru.
- General Settings
- Layout settings
- Settings email
- Promotion box settings
- Custom Guru URL
- API Order settings
General Settings
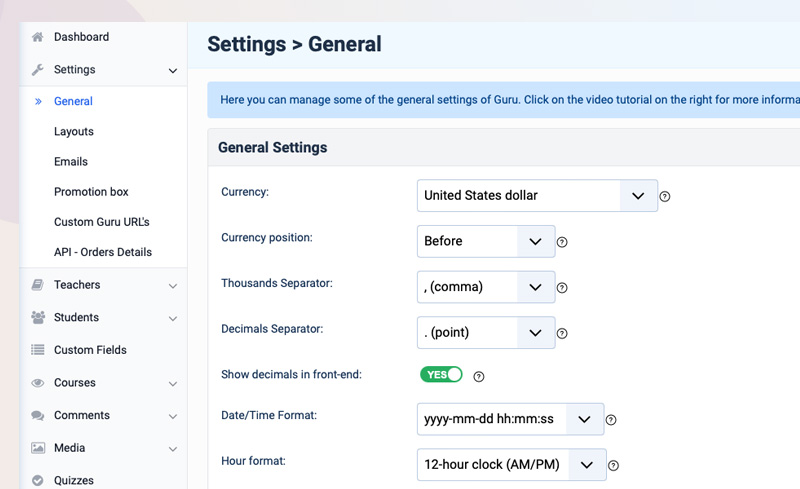
- Currency: This option is used to set the default currency for the Guru course.
- Currency position: set the position of the currency symbol before or after the price.
- Thousands Separator: Separator in the currency
- Decimals Separator: Decimal Separator in currency
- Show decimals in front-end: Yes/ No
- Date/Time Format: Set the date and time format in courses
- Hour format: select the hour’s format for guru courses
- 12-hour clock (AM/PM): Set the time value AM/PM
- Invoice issued by: Add the issue by details if you want the invoice to have an issue by. An invoice is available for students when they buy a course.
- Show news on cPanel: This option displays the latest news from us on the Guru dashboard for new releases and updates.
- Show breadcrumbs: Allow the bread crumbs to display in Guru pages.
- Show Powered by: Show or hide Guru copyrights on the front end.
- Ignore iJoomla SEO internal links on the table of content: Choose to Ignore iJoomla SEO internal links on table of content:
- Turn off jquery: Turn off jquery in case the template is already loading to avoid conflicts.
- Turn off Uikit: Turn off if the template already supports Uikit
- Template Direction (LTR / RTL): Set the content direction for RTL
- Students default group: Select a user group for students. A new student will be added to a selected user group.
- Default video size: (Height): Select the default height of video showing in Guru courses the value will be in px.
- Indicate quizzes lessons on the table of content: Show quiz lessons on the course table content view.
- Show Captcha on the registration page: Show captcha on the user registration page
- Auto approves new students: If allow yes all students will be automatically approved
Available Certificate Icons
This section helps you to customize the student’s certificate view to show hide the certificate icons.
- Certificate Template for HTML View: Yes if you want to display the HTML view of the certificate for students.
- Certificate Template for PDF View: Allow PDF view of certificate
- Share Certificate Icon: share certificate options
- Email Certificate Icon: Email certificate
Layout Settings
This section will help you to display settings in course pages, course category pages, teachers list pages. For example, you want to control the course page view to show or hide tabs, teacher name,read more, description intro, etc. all can be managed from the layout settings.
Here are options in Layout settings :
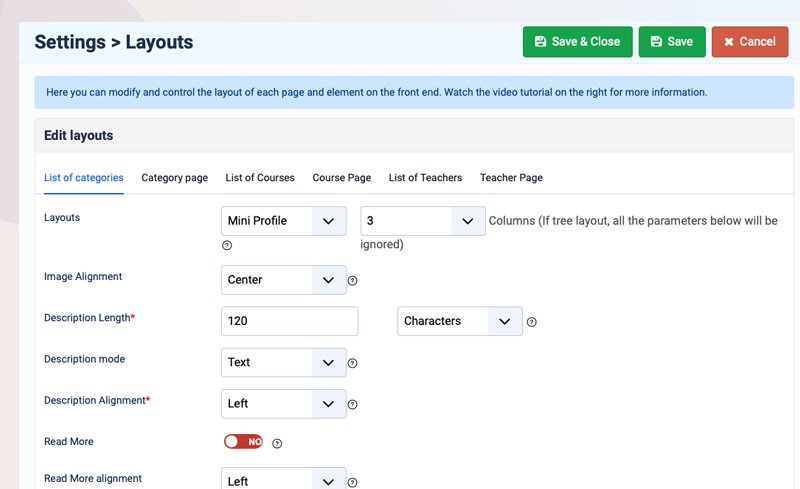
- List of categories
- Category page
- List of Courses
- Course Page
- List of Teachers
- Teacher Page
Each Tab will contain respect page settings to show/hide the elements set as a default tab.
For example in the below video, you can see how you can set a different default tab on the course page and hide the elements.
Emails
This section will help you to set up the Emails configurations that are sent to students, teachers, and the Administrator.
You can Turn the Email ON or Off from this section and Also edit the Email templates.
Here are the list of options that you can use to configure for email templates
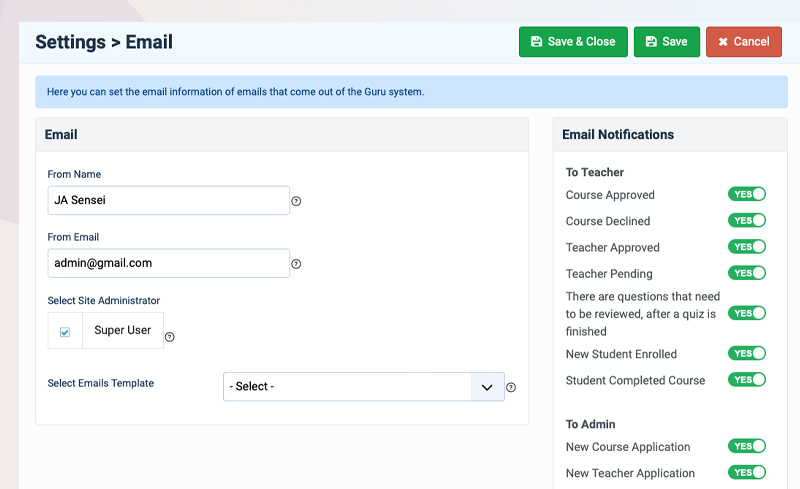
Email To Teacher :
- Course Approved
- Course Declined
- Teacher Approved
- Teacher Pending
- There are questions that need to be reviewed after a quiz is finished
- New Student Enrolled
- Student Completed Course
Email To Admin
- New Course Application
- New Teacher Application
- New Teacher Registered
- New Student Registered
- A pending order
- New Student Enrolled
- Student Completed Course
Email To Student
- Order Approval
- Teacher has graded and checked the quiz results
- Teacher has reviewed and scored your essay(s)
Promotion box
The Promotion box option is used to display the Promotional information on the course page.
For example, you want to set a course as Paid, When a user wants to view the lesson content he will get a message on the screen :
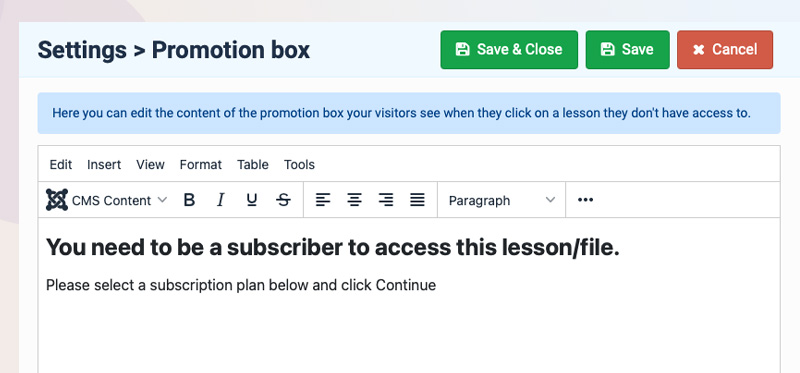
Once the message will be saved on the backend you can see it on the frontend. Once if user is not subscribed for course.
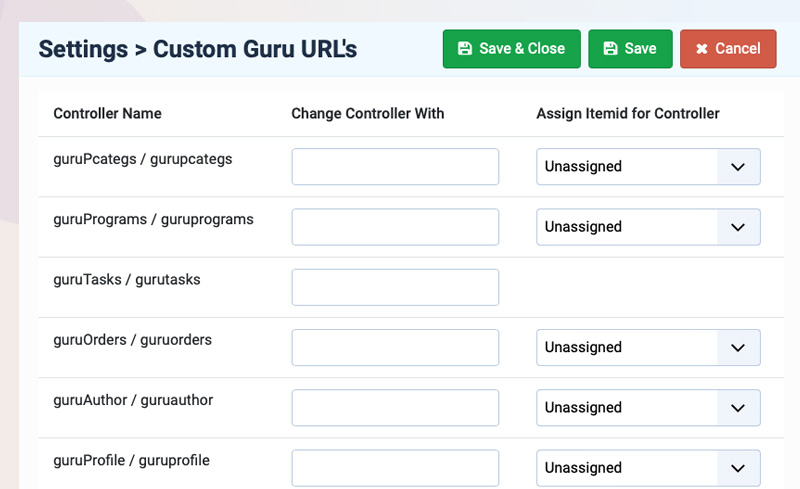
Custom Guru URLs
This is one of the important options in Guru and must be configured correctly.
All the Menu items in Guru use the core routing that includes guru in the URL. If you would like to replace the default URL alias you can change it from this section.
 Example :
 When you open a course category on the frontend it will use the following alias :
guruPcategs / gurupcategs
Now if you want that this will be replaced by category only or course categories You can put the controller name with categories. It works the same for all other options as well.
The item ID for controller: You can also assign a menu item for the category URL so all courses of that category will open under the assigned menu. Do not apply this change if you have multiple categories or multi language sites as it always uses the assigned Menu item.
API Order
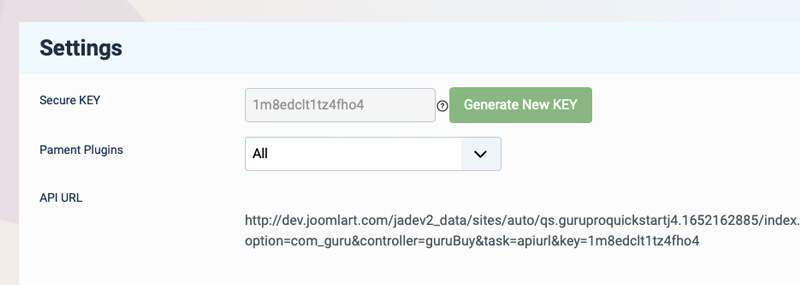
API Order: CC JSON export: For payments in Guru, To use this Open Guru admin > Settings, API – Order details.
A key must be generated and saved, then the URL created will give the admin all the CC details from orders in JSON format they can use with other programs.
Teacher Management
This section will help you to understand how the teachers are managed on the website. The teacher settings include following configurations:
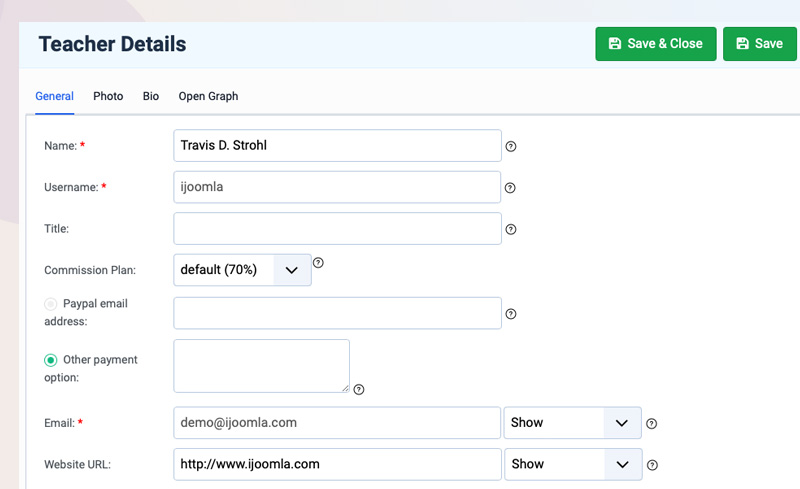
Manage teachers
Manager teacher's tab gives a list of the teachers that are already present on the website with publishing and unpublished form. An Administrator can Edit/Add or approve a teacher.
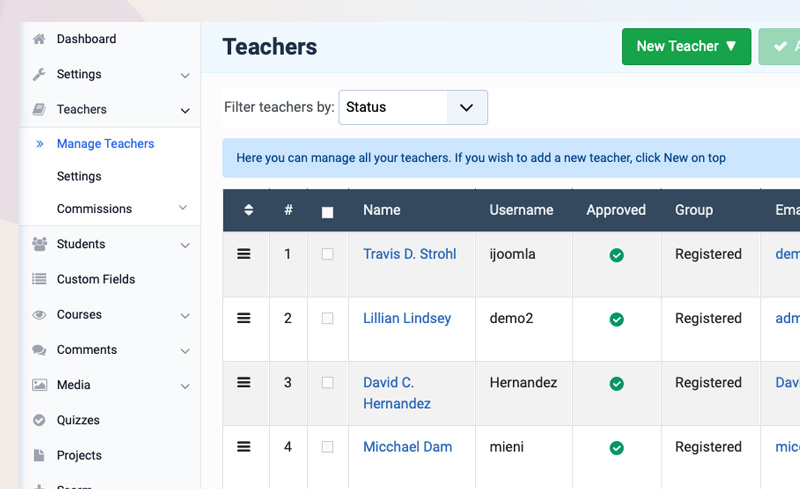
When a new teacher is registered on the website he will appear in this section and the administrator has full control to edit his account to set the commission as well.
A teacher profile set includes options for General settings, Profile avatar, and bio description.
Teacher settings
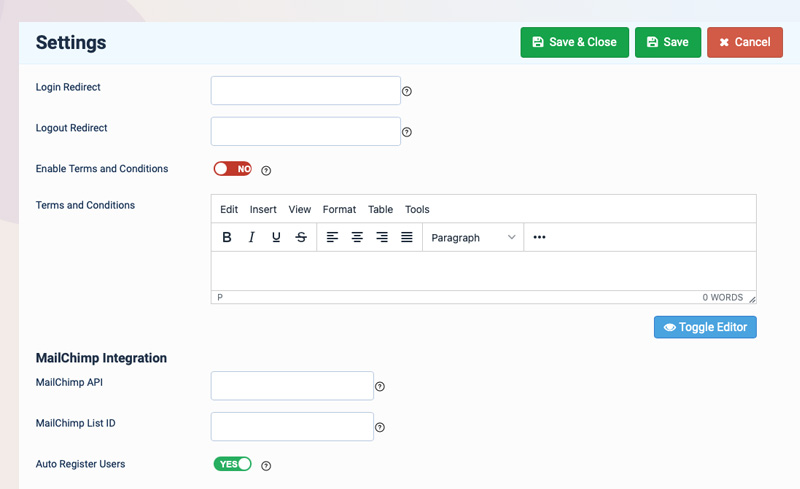
Teachers Settings gives configurations control over the teacher’s account including its frontend view.
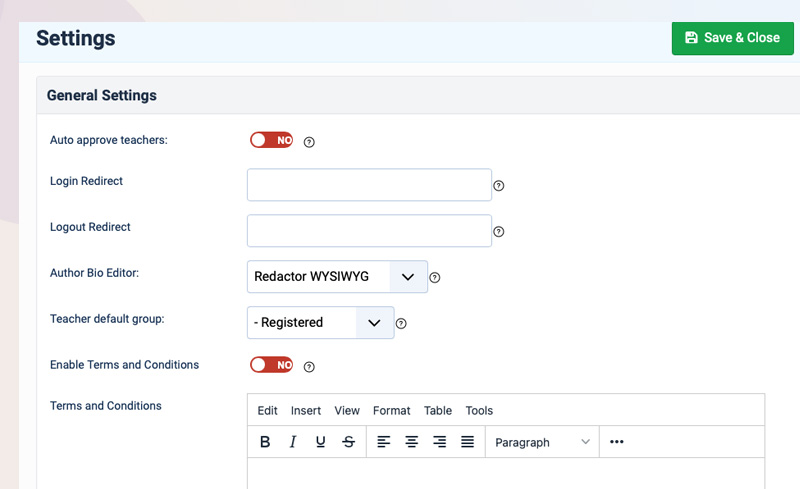
- Login Redirect: You can add a URL for the teachers landing page when login
- Logout Redirect: You can add another URL for the teacher landing page when logging out.
- Author Bio Editor: This option will allow you to choose an editor to display in Teacher’s bio.
- Teacher default group: You can select a user group for teachers when they register on-site.
- Enable Terms and Conditions: Enable it on the teacher’s registration page.
- Terms and Conditions: Add Terms and conditions text.
MailChimp Integration
This section allows you to set up Mailchimp subscriptions. You can add the teachers to the Mailchimp subscriptions list when they register on the website.
- MailChimp API: Add Mailchimp List API key in this field.
- MailChimp List-ID: Add Mailchimp List ID.
- Auto Register Users: Allow teachers to automatically add to the subscription list.
Allow teachers to :
This section gives options to allow to block the configurations in the teacher’s frontend dashboard. You can set the options Yes or No.
Create free courses
- Add media
- Edit own media
- Add courses
- Auto approves course
- Edit own courses
- Publish own courses
- Unpublish own courses
- Delete own courses
- Add quizzes/Final Exams
- Edit own quizzes/Final Exams
Teacher Menu Items
This section gives control over the Teacher dashboard Menu items. You can show or hide the below menu item by setting the value to Yes/No.
- Courses Menu Item
- Students Menu Item
- Projects Menu Item
- Scorm Menu Item
- Quizzes Menu Item
- Media Menu Item
- Commissions Menu Item
- Grade Essays Menu Item
Custom Fields Registration :
You can use the Guru Teacher Registration page for new custom fields. For this, you need to create custom Field Groups and custom Fields from Joomla Users pages and all these new Groups and Fields will be listed on this page. You can select which custom fields will be used for the Teacher Registration page.
The selected Fields will be available in the front-end for the Teacher Registration page and Teacher Profile page.
Comission system
Our commission system is the last missing feature needed to turn your Guru site into a fully-fledged learning platform like Udemy. It lets you set teacher commissions, track sales and pay teachers easily.
The new commissions’ system can be personalized for each teacher separately. It produces reports and has a batch payment option to send money through Paypal to your teachers.
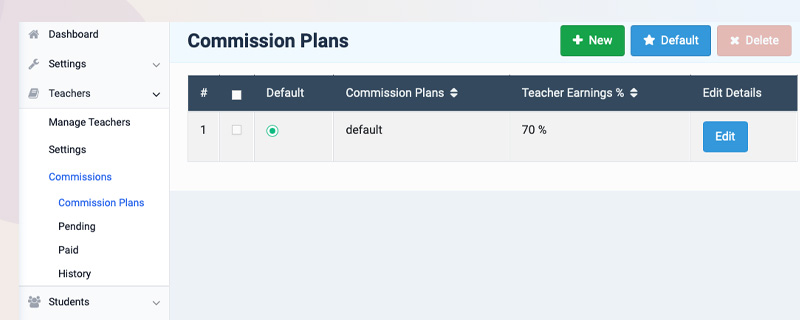
Manage the commission plans
To add a commission plan, open the backend of Guru and navigate to Settings > Commission Plans.
You can create as many commission plans as you like, and set a default commission system for all new teachers too.
By giving each teacher a different commission plan, you can negotiate teacher earnings individually.
WE CALCULATE THE DISCOUNT!
Offer discounts? No problem. We take the price of the course, subtract the discount and calculate the commission based on the amount actually paid by the student. It's only fair.
FLEXIBILITY MAKES ADJUSTMENTS SIMPLE
You can change the commission plans for your teachers at any time without affecting previous plans. So if a course was purchased when a teacher was on a previous rate, their commission will be calculated based on their old rate. All future purchases will be calculated based on their new rate. It's really brilliant.
SUPPORTING PAYPAL AND MASS PAYMENTS
We've also made paying simple. Just click on “batch payment” to pay all your teachers at the same time with PayPal. Don't forget to mark the selected commissions as paid.
Teachers can set their own PayPal email addresses, and if they've registered with a different address, we give them a dedicated field.
Export data
The commission system is full of ‘export' buttons, allowing you to download any data you like: history, pending commissions, details of already paid commissions… everything.
It's insanely easy and useful. You can export to CSV. Your teachers can export their earnings reports on the front end as well.
Teachers Earning
Teachers want to know exactly how much they're earning. Guru's new system lets them track the orders. They can see how much they've already received, the details of those orders, and how much is pending withdrawal.
Pending Commission
Teachers can see their pending commissions any time they want.
Received Commission summery
We give teachers a history of what they were paid when they were paid and what the payment consisted of. It's simple and detailed and comes all wrapped up in a clean design that's easy to navigate.
Payments
If a teacher doesn't have a Paypal account, they can ask to be paid by bank transfer, Western Union, and a bunch of other methods.
Students :
This section will explain how to manage the students and how to setup the registation setting for the students.
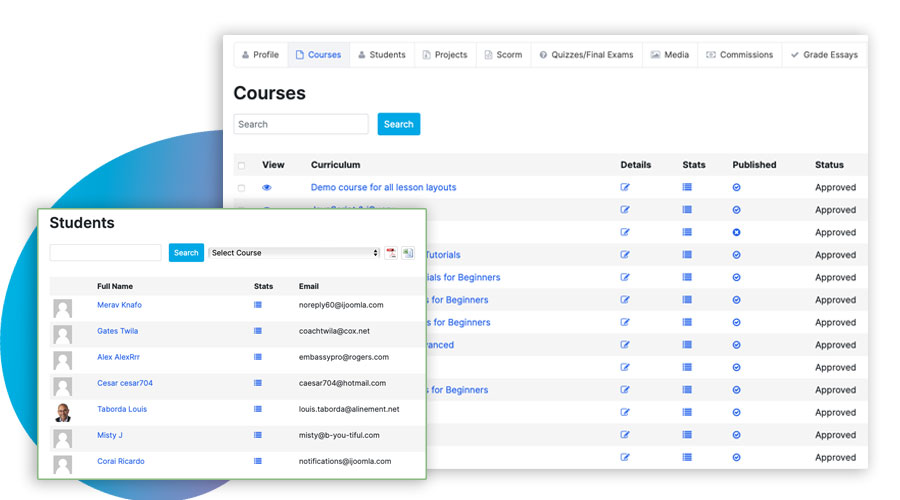
Manage Students :
The configurations allow you to add, edit or delete a student profile data and also reset the course for student.
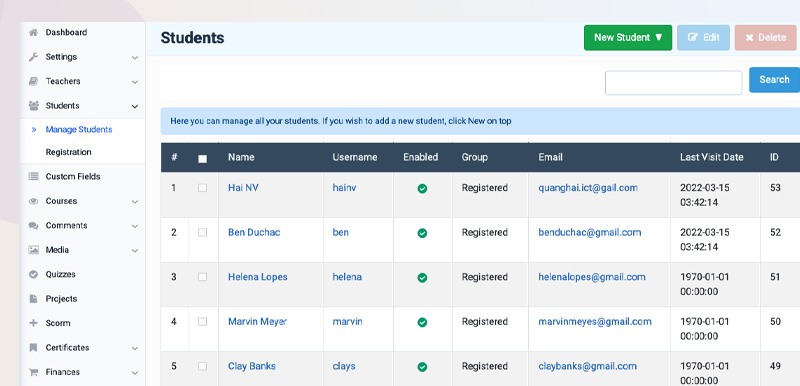
Example : If you want to reset a student course progress you can open the student profile, select the course that you want to reset and click on the reset course button.
This option allows you to remove a student from a selected course. In any case if a student requests a refund or you find the student's access to the course is not valid you can select the course and click on remove from selected course button. Once done the student no longer is part of the course.
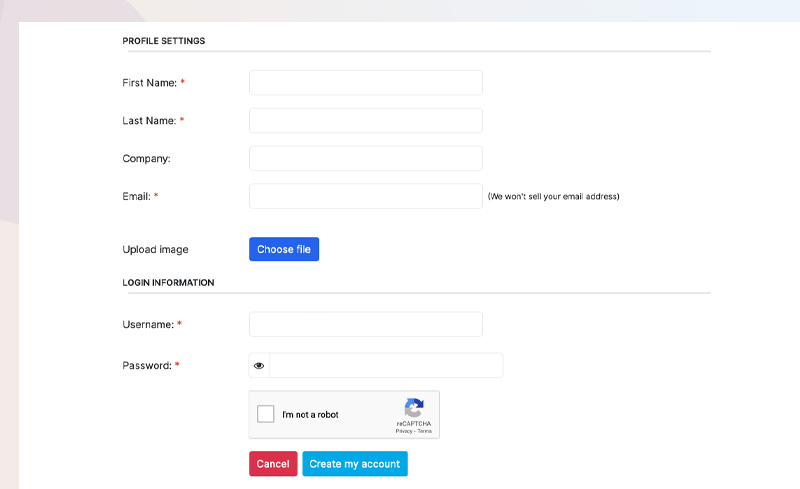
Student Registration settings
This section will help you to set up the student registration page settings.
- Login Redirect: You can add a URL for the students landing page when login
- Logout Redirect: You can add another URL for the teacher landing page when logging out.
- Enable Terms and Conditions: Enable it on the students registration page.
- Terms and Conditions: Add Terms and conditions text.
MailChimp Integration
This section allows you to set up Mailchimp subscriptions. You can add the students to the Mailchimp subscriptions list when they register on the website.
- MailChimp API: Add Mailchimp List API key in this field.
- MailChimp List-ID: Add Mailchimp List ID.
- Auto Register Users: Allow students to automatically add to the subscription list.
custom fields
You can use in the Guru Student Registration page new custom fields. For this you need to create custom Field Groups and custom Fields from Joomla Users pages and all these new Groups and Fields will be listed in this page. You can select which custom fields will be used for the Student Registration page.
The selected Fields will be available in the front-end for Student Registration page and Student Profile page.
Student registration form:
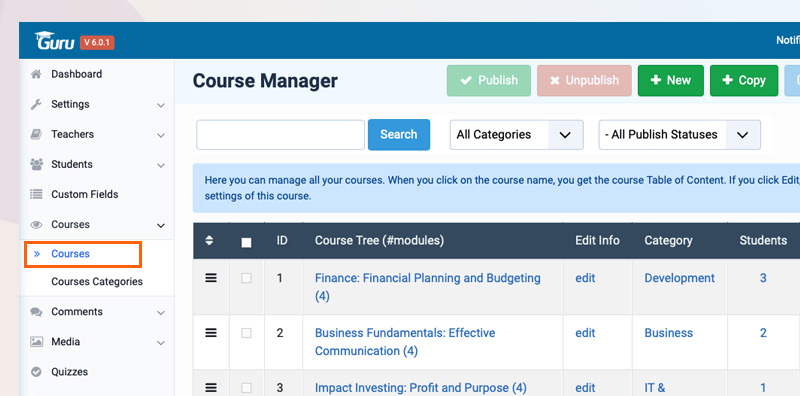
Course management
This section will help you to understand how a new course can be added in Guru and how you can edit the previous course to add new lessons subscription plans in it.
Course Category
Before creating course, you should create categories to organize your courses better. Open courses > categor
Open Guru > Courses > Category > Add New category > New.
Create new category page and full fill the information: title, parent category, category description, category image, icon, and Open Graph meta data.
There is special ACL option in course category, If you want the category and course under that category will appear to specific user group, select the user groups. Leave it blank will put the course accessible for all users.
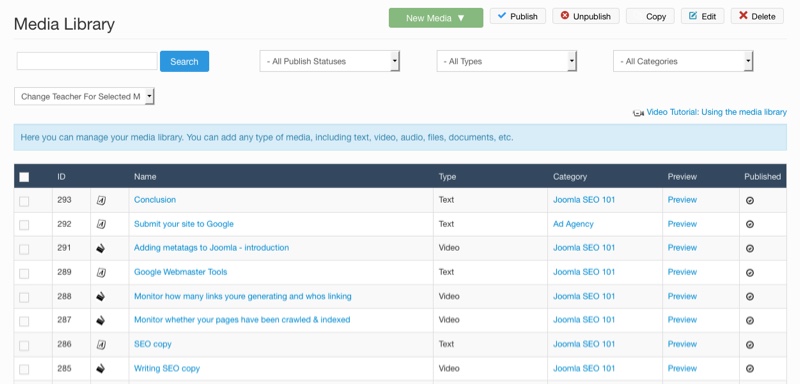
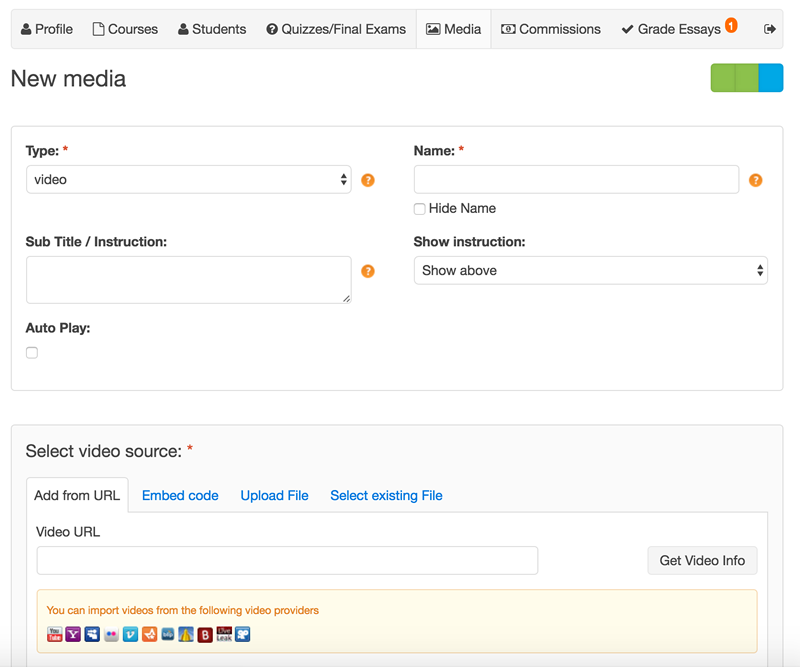
Media Management
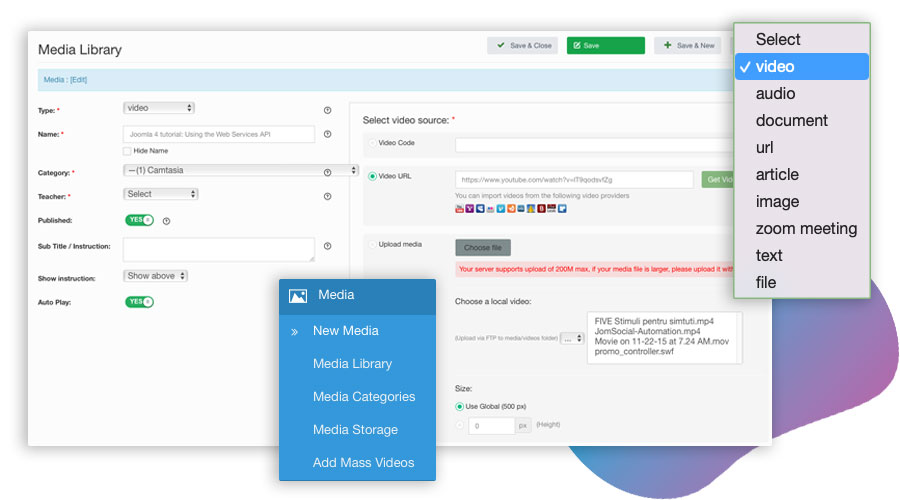
Add any type of media to your media library: video, audio, text, files and more!
Our Joomla LMS Media Library, allows you to create a comprehensive library of all types of media: video, audio, documents, files and text.
Each of the media files can be used and reused in any of your courses modules/lessons.
View All Your Media in the Media Library:
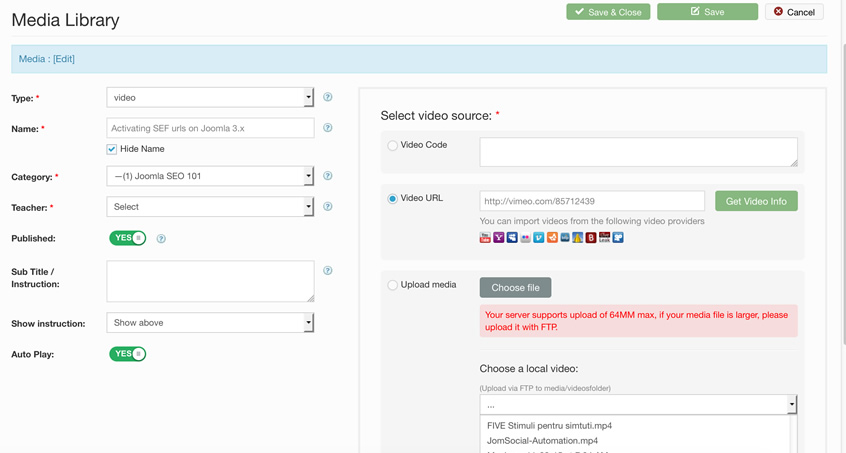
Video – Supports Three Ways of Adding Videos:
- External sites like YouTube.
- Local videos on your server that you can upload or select from existing videos.
- Video code (just copy the source code from any video on the Web).
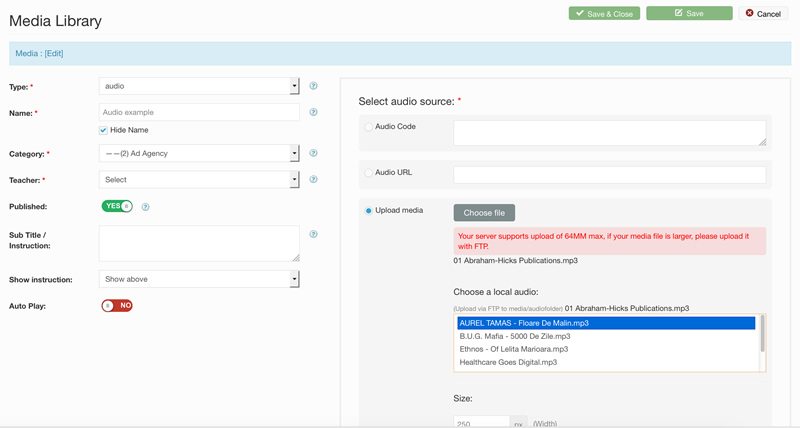
Audio – Supports Three Ways of Adding Audio:
- Audio URL - simply enter the audio file URL.
- Upload an audio file or select existing audio files.
- Audio code (enter the audio code from another site).
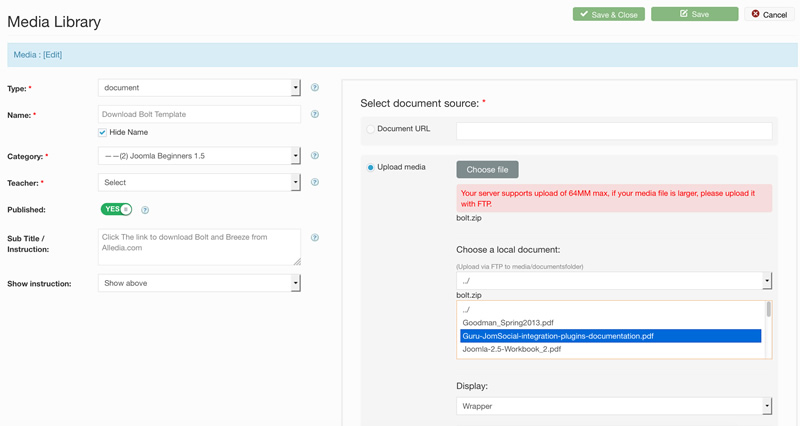
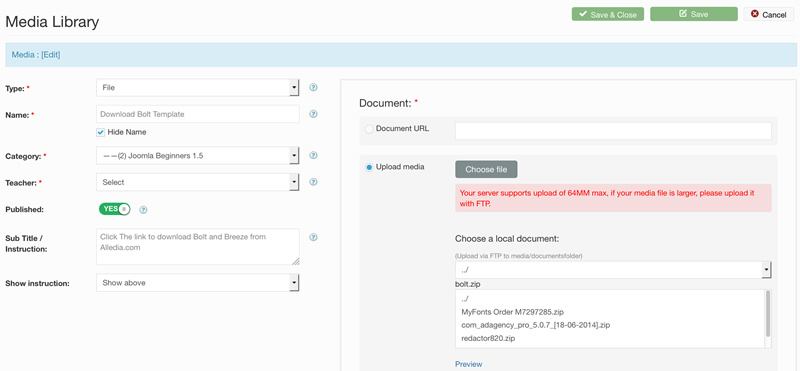
Document – Select One of Three Ways to Add a Document:
- Document URL - enter the document file URL.
- Upload a document, PDF or Word Doc.
- Select an existing document.
Choose How to Display the Document:
- Inside a wrapper.
- As a link to the document.
URL – Enter a URL:
Select One of Two Ways to Display a URL:
- In a wrapper.
- As a link.
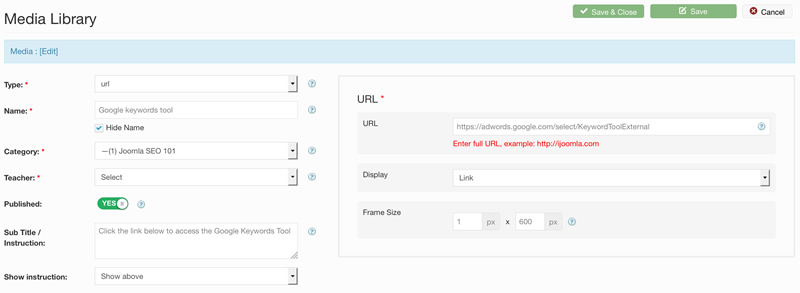
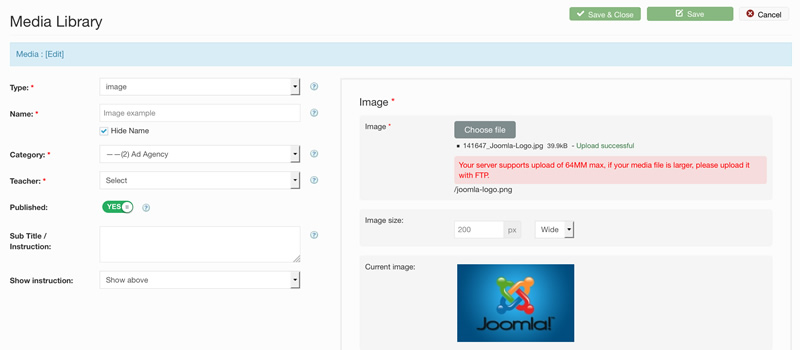
Image – Add Any Image to Your Media Library:
- Choose the size.
- Choose whether it's proportional by width or by height.
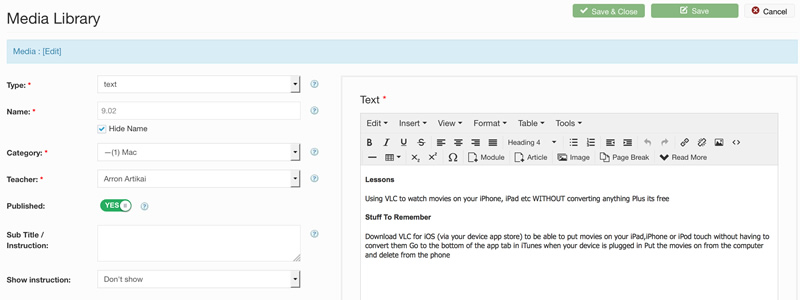
Text – Add Text into the HTML Editor to Be Used Later:
File - Upload .exe and .zip files in Two Ways:
- Enter the file's URL.
- Upload the file.
Add course
To add a new course open > Guru > Course > add new. This will show different tabs that are used to submit the course information, Price , cover and more. Here is list of tabs and features:
- General
- Description
- Cover/Avatar
- Exercise files
- Pricing/Plans
- Publishing
- Meta Tags
- Requirements
- MailChimp
- Purchase Email Template
- Custom Certificate
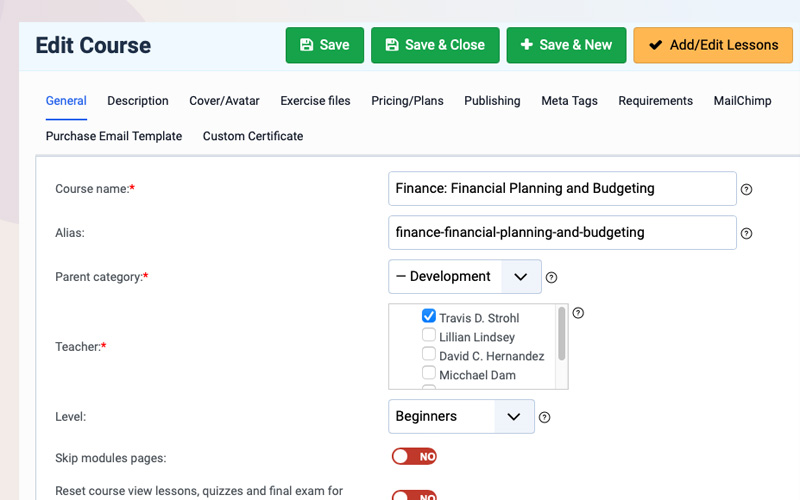
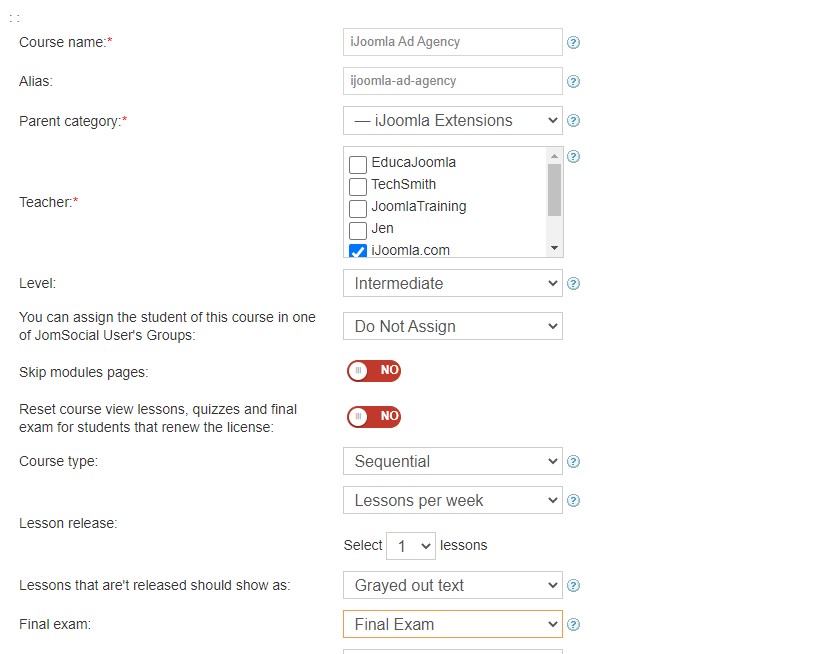
General Tab:
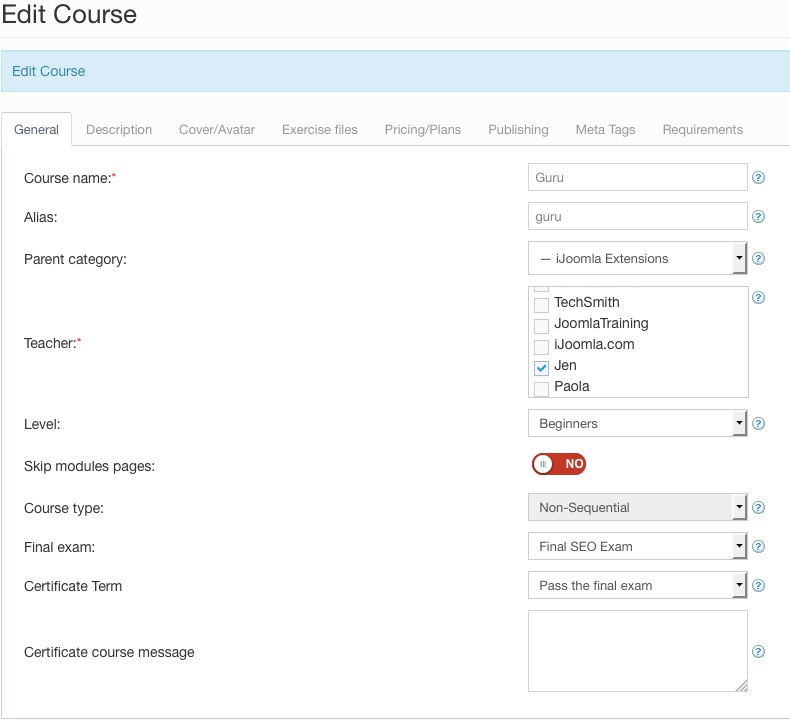
The General tab consist the main requirement to start a course like name of the course, alias, certification terms, Final exam, Teacher of the course and more. Once you will fill the information, you are ready to fill next tab information.
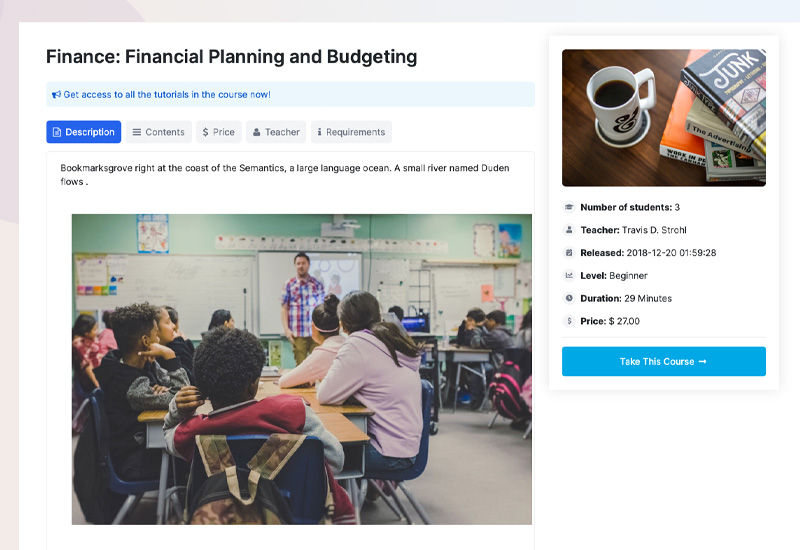
Course Description:
The description of the course refer to the about info of the course you can add the course information here and it will be displayed on the course page on frontend and on the category pages.
Cover Avatar :

The cover tab consist the image part of the course view. You can put the cover image and small avatar for the course view and it willl show on the frontend. It also consist the open graph tags that will help you to show correct infomation of course when you share the course on Facebook.
Exercise files:
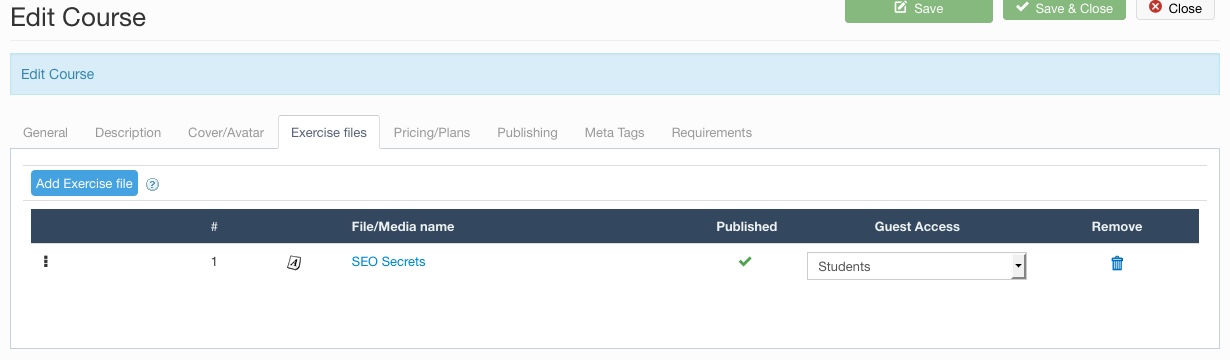
The Exercise files tabs will show on the frontend. You can add only DOCUMENT and FILE media types. To upload a new excerise file Navigate to Media > Add new media option.
Pricing/Plans:
- Select the subscription plans and set the price.
- Select the renewal plans and set the price.
- Select which subscription e-mail reminders will be sent.
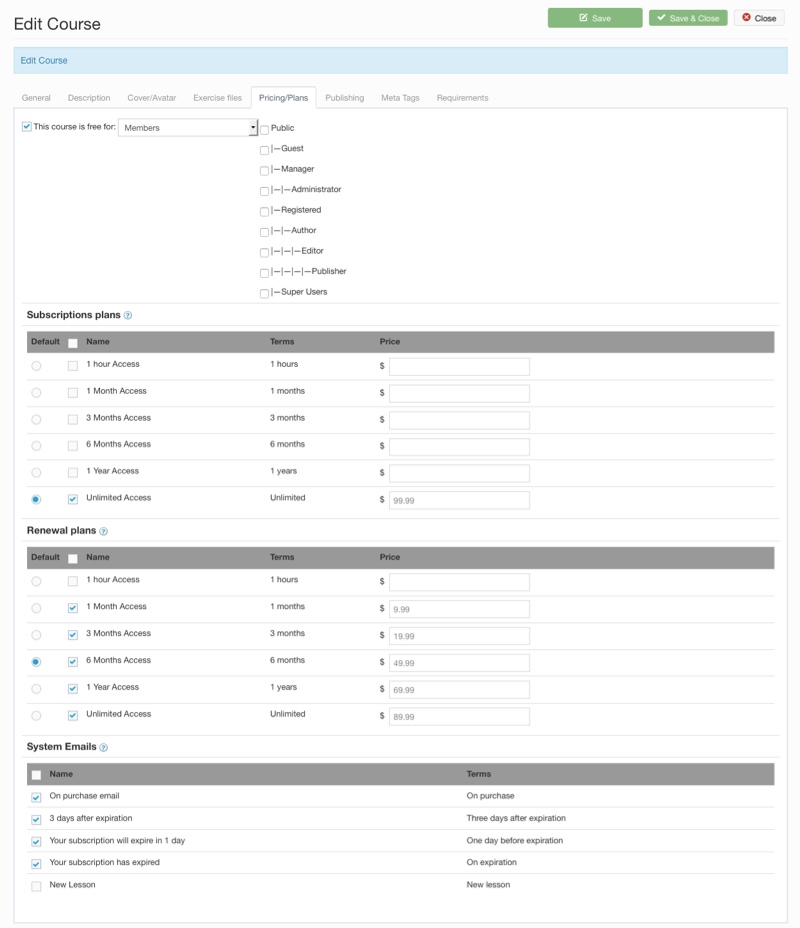
You can choose diffeerent plans for the normal subscription and Renew. Also there is option to make the course free as unlimited access for one course user or a usergroup.
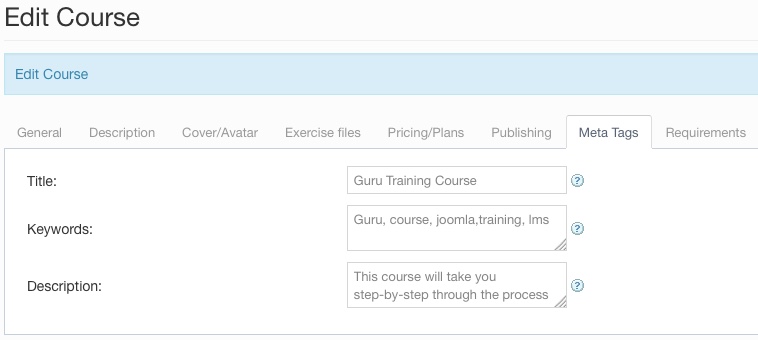
Meta tags:
Add your course Metadata for a better SEO results on the serach engines.
Requirements
Choose which courses are prerequisites to this course. You can add as many as you wish. These courses will be listed on the requirements tab of the course on the front end.
MailChimp
This option allow you to add Mailchimp newsletter integration you can add the student in your mail list for the newsletter
Purchase Email template
This option allow you to make separate email template for each course, on purchas the email will be sent. If its blank it will use the default Email template
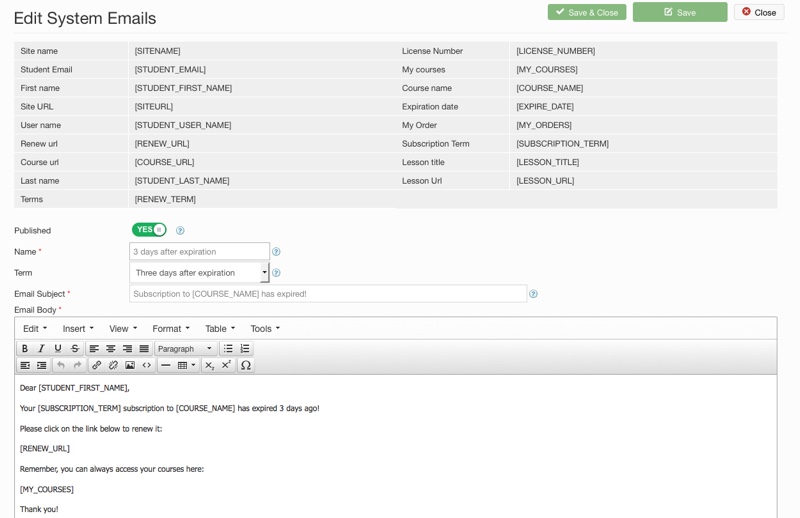
Here is list of supported tags in email template
- Site name [SITENAME]
- Student Email [STUDENT_EMAIL]
- First name [STUDENT_FIRST_NAME]
- Site URL [SITEURL]
- User name [STUDENT_USER_NAME]
- Renew url [RENEW_URL]
- Course url [COURSE_URL]
- Last name [STUDENT_LAST_NAME]
- Terms [RENEW_TERM]
- License Number [LICENSE_NUMBER]
- My courses [MY_COURSES]
- Course name [COURSE_NAME]
- Expiration date [EXPIRE_DATE]
- My Order [MY_ORDERS]
- Subscription Term [SUBSCRIPTION_TERM]
Custom Certficiate
This option is used if you want each course has a different certificate template. You can turn on the option and make a certificate. If its off it will use default certificate temlate from > Guru > Certificate > templates.
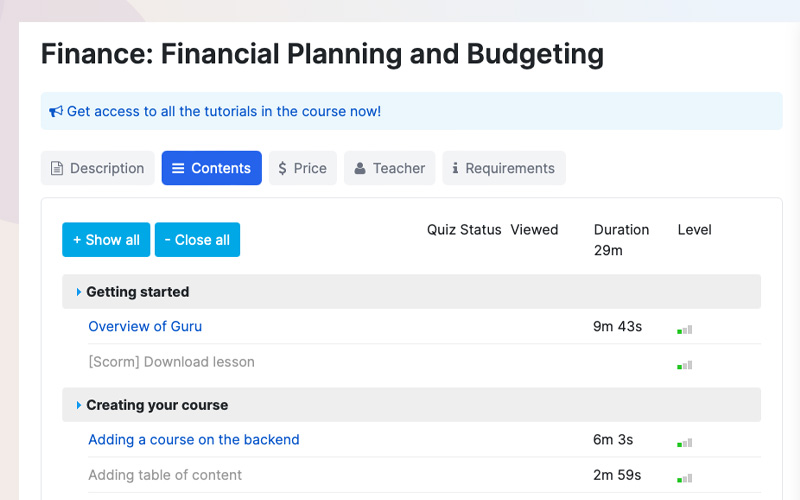
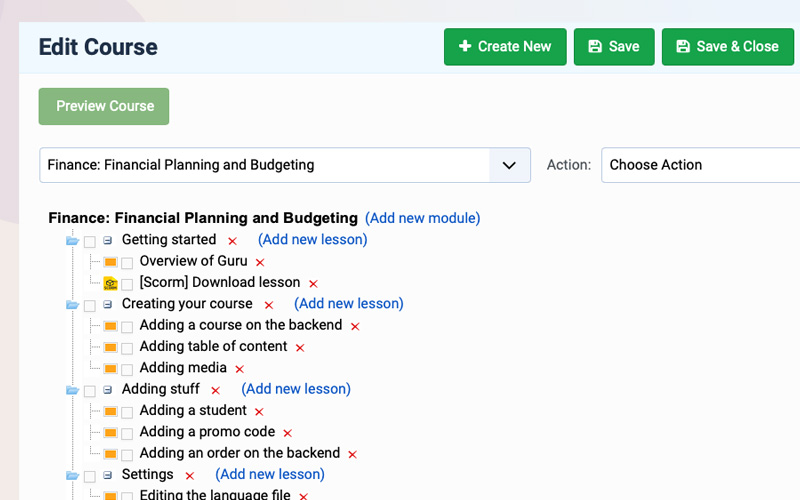
Course table of content - lessons
Once all infromation is added you can save the course and start adding the course module and lessons.
Create a Table of Content for your courses using our easy drag & drop feature With our Joomla LMS, you can add a table of content for each course. The Course Tree feature makes constructing your course a breez
Course actions:
- Add new modules and lessons on the fly.
- Edit the modules and lessons by clicking on them.
- Remove modules and lessons by clicking the red x.
- Reorder the modules and lessons by dragging and dropping them.
Add/Edit Modules
This allows you to stay on the same page. You can enter the module name, select a media and access. If you don't choose any media or text, the module name will be displayed in large font inside the module window.
Our LMS for Joomla component allows you to add lessons to your learning modules. Lessons contain the actual learning material, whether it's a video, text, document, quiz, URL, file or other type of media.
To add a lesson, click on "Add Lesson" on the course tree.
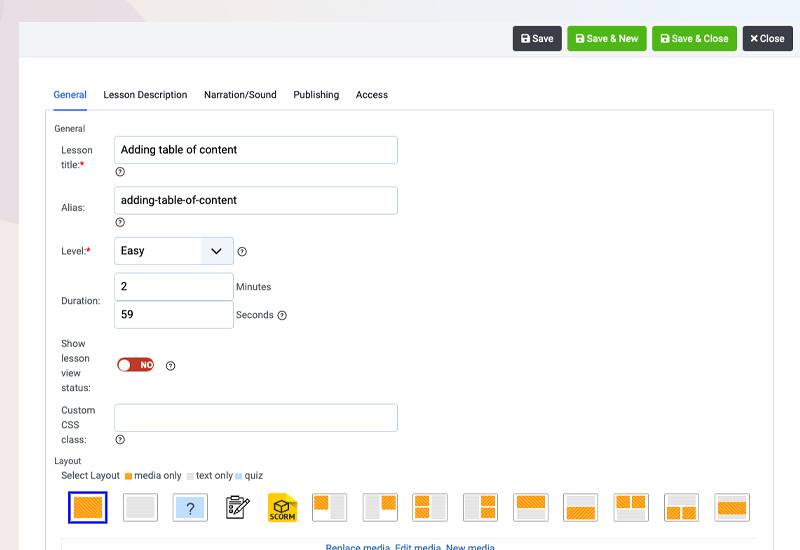
A Lightbox Style Pop-Up Will Open with Four Tabs:
General Tab
- Choose a lesson name and alias.
- Choose the difficulty level.
- Choose who can access this lesson (visitors, registered users, students).
- Choose one of 12 available layouts.
- Set duration.
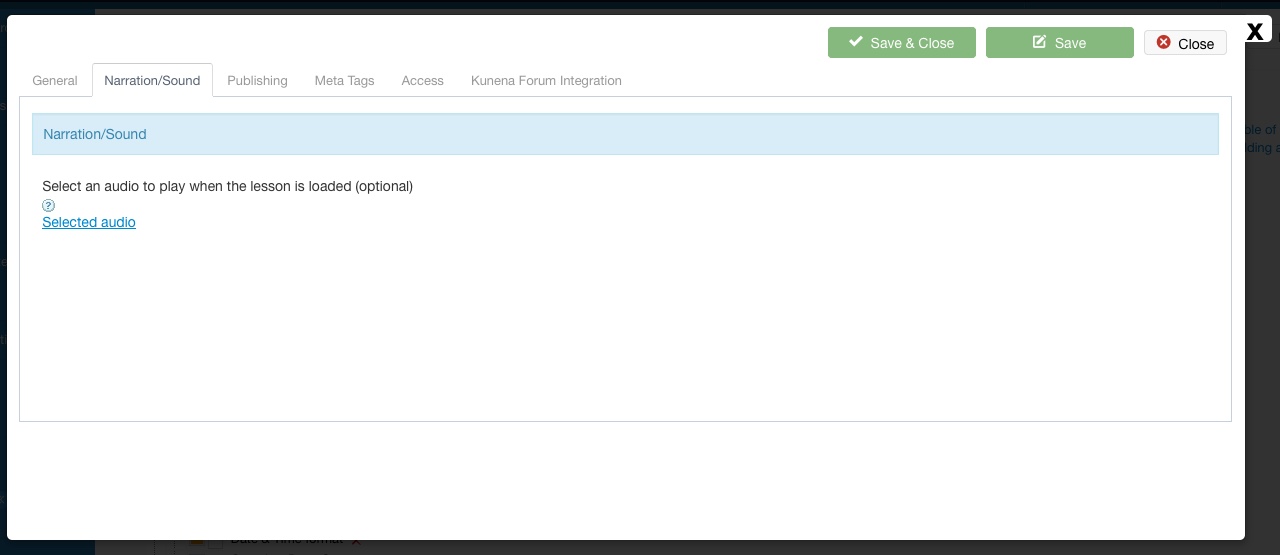
Narration/Sound Tab
- Select a narration or sound that will play automatically when the lesson is loaded. This is very useful if you want your student to hear you giving them instructions such as "Click on the document below, fill it out and send it to me" or "Read this article and then move to the next step."
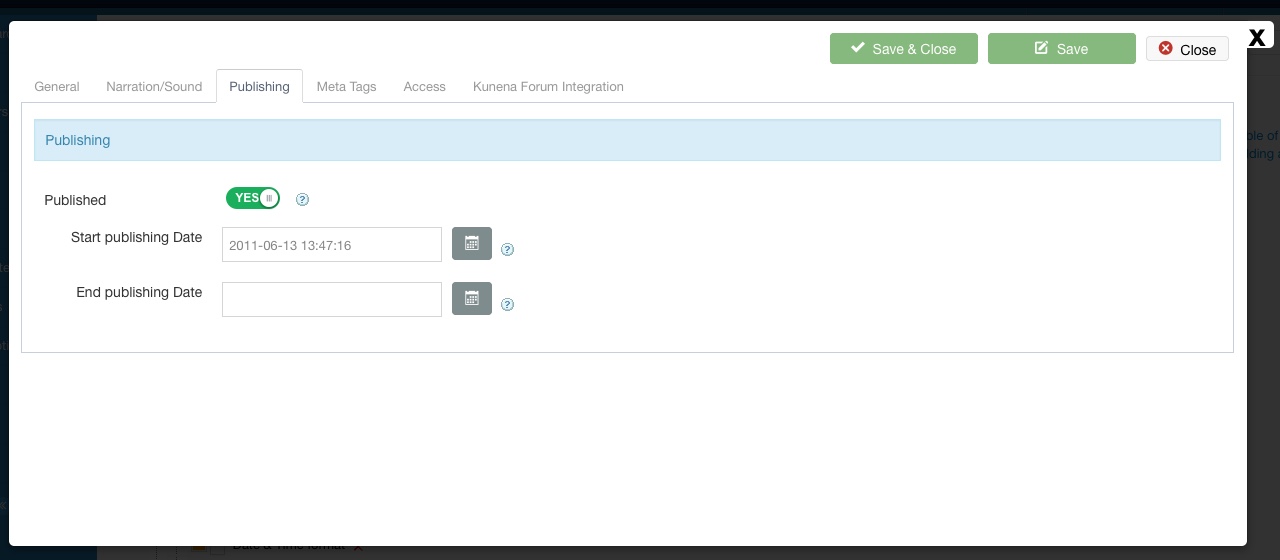
Publishing Tab
- Published – yes or no.
- Date start.
- Date finish.
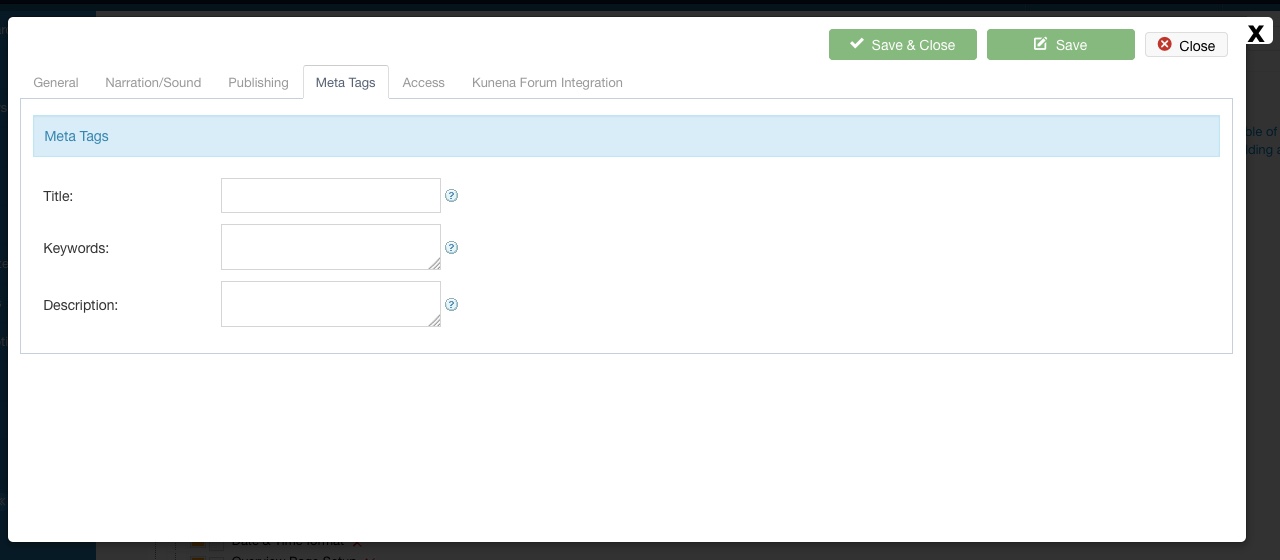
Metatags Tab
- Title, keywords, description metatags
Quiz
Joomla LMS learning quizzes are a great way to find out if your students understand the learning material.
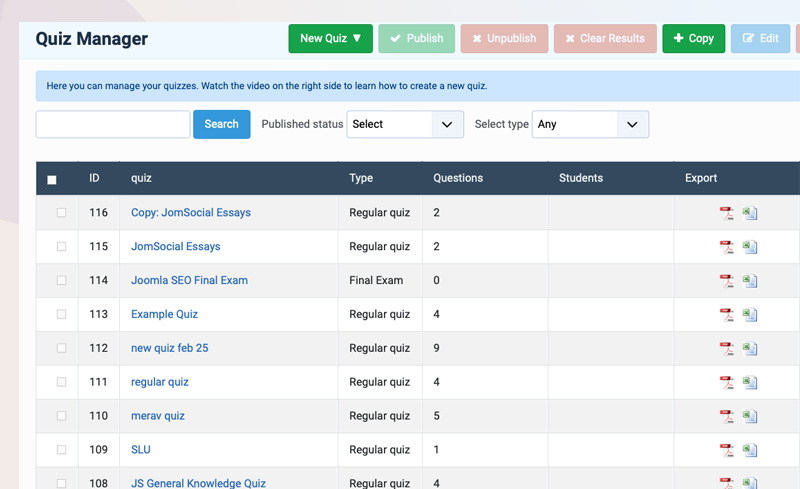
The Quiz Manager allows you to create quizzes that you can later add to your lessons. Quizzes are great to make sure that your students understand the material they’ve been studying so far. You can add quizzes to your course modules inside a lesson.
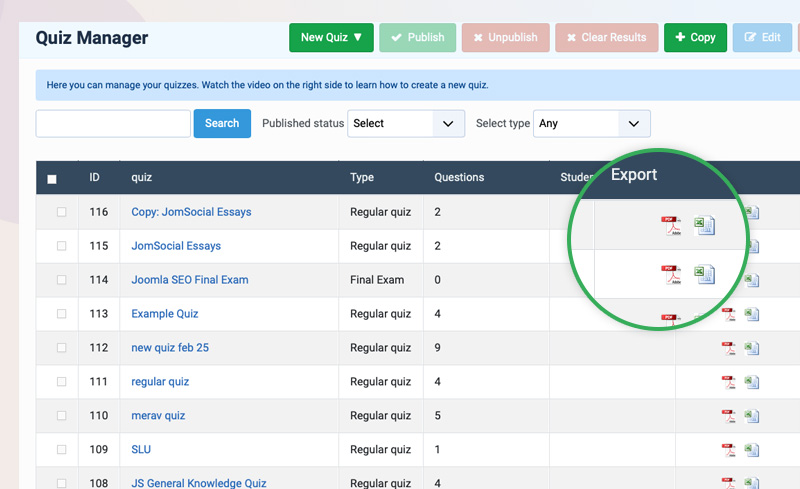
You Can See All of Your Quizzes on the Quizzes Manager:
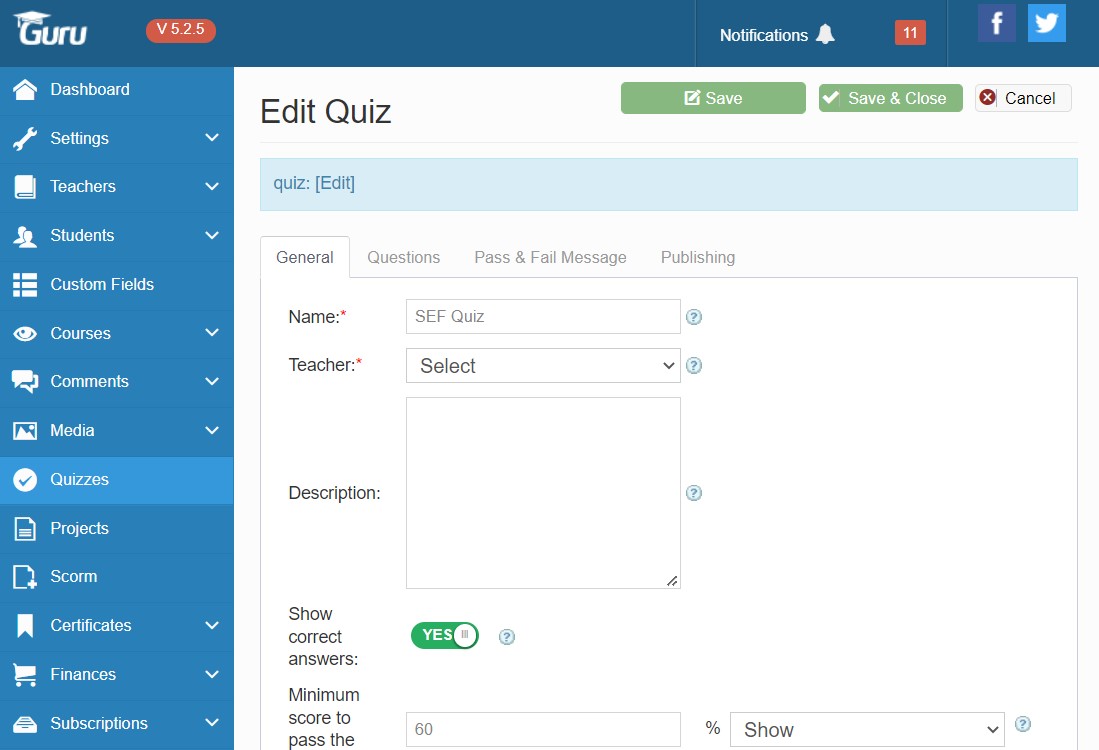
Create a New Quiz, Add a Name and a Description on the General Tab:
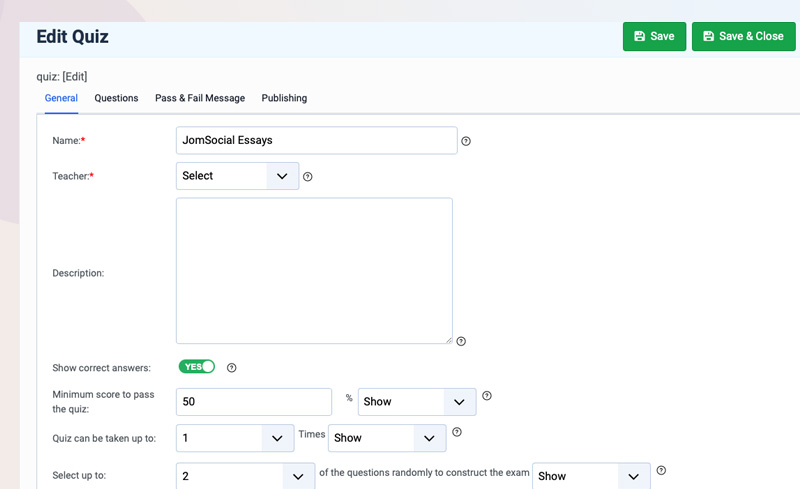
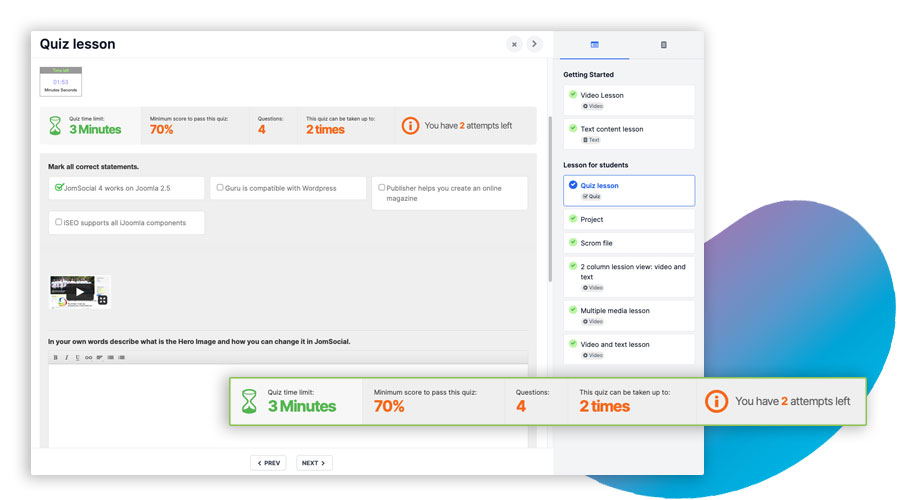
Add additional optional quiz options
- Enter a minimum passing score.
- Set a time limit in minutes to submit the quiz.
- Choose the number of times the quiz can be taken.
- Define the number of available questions selected randomly to construct the quiz.
- Question weight to decide which questions are more important than others.
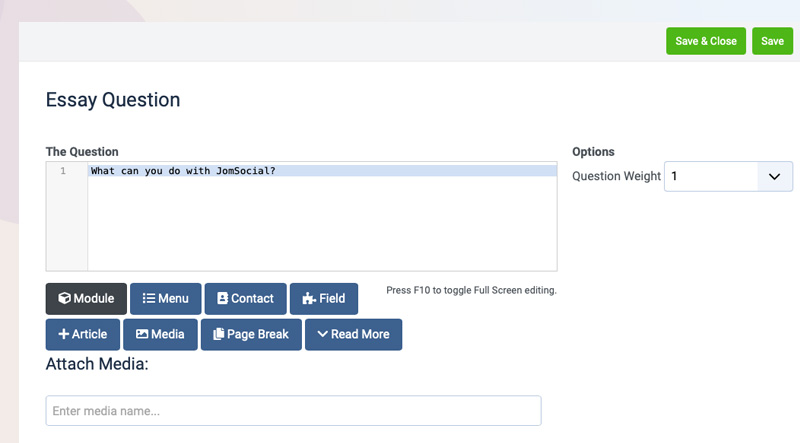
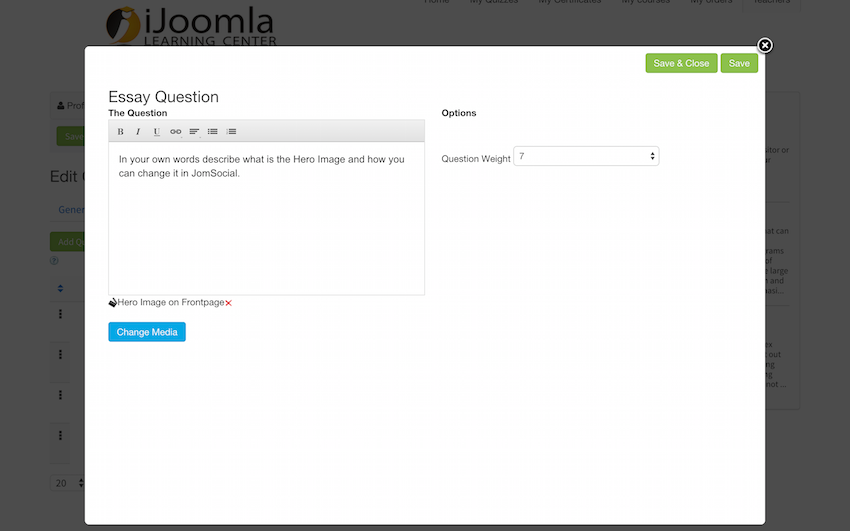
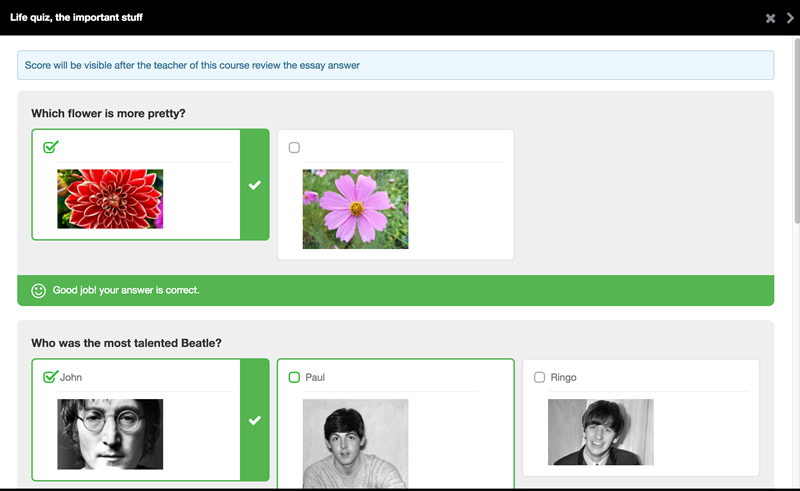
- Add media to quiz questions
- Add media to quiz answers
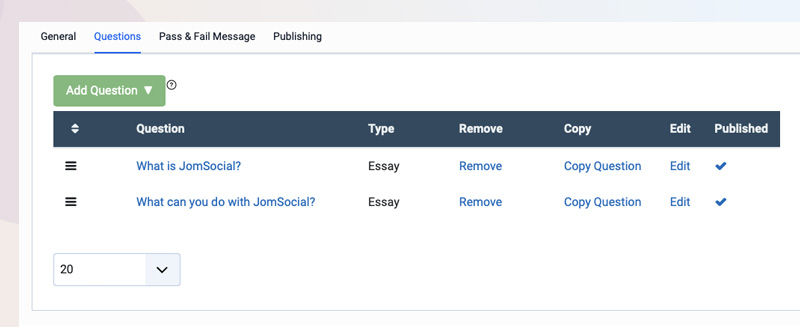
Edit the Question and the Possible Answers:
On the Backend:
On the Frontend Teacher Interface:
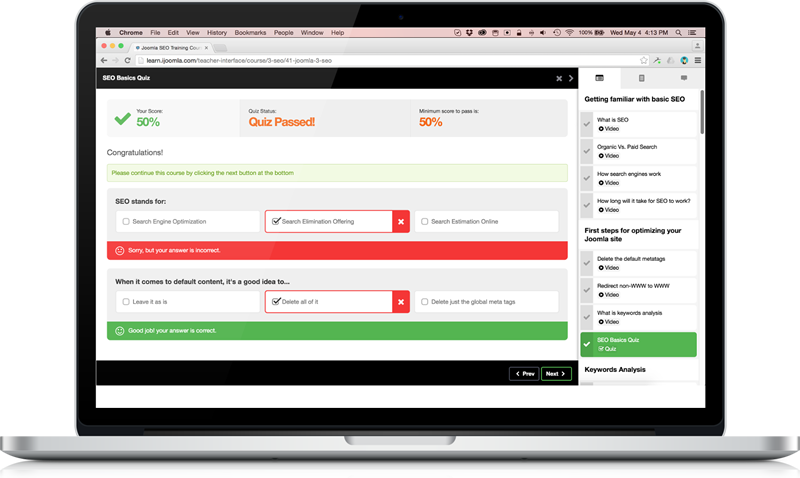
The Quiz Looks Like This on the Front-End: After submitting the quiz, it looks like this:
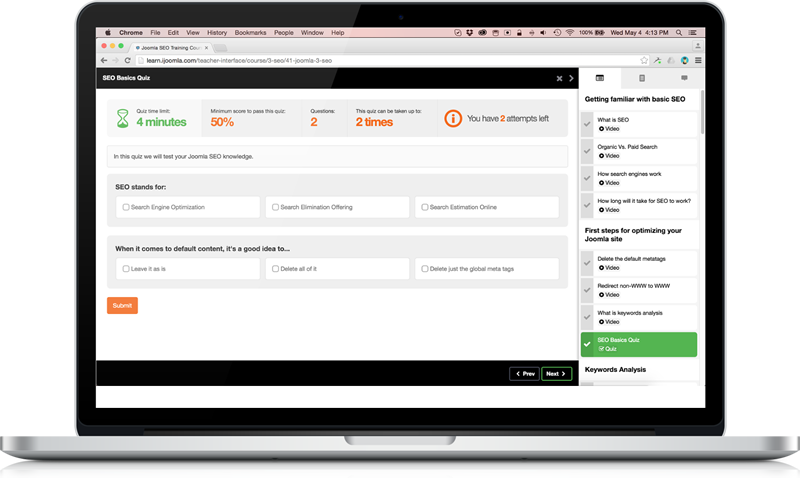
The student can see which of the questions he got right and wrong.
You can also add any media to your questions or to your answers (images, videos, etc.)
You can download/export the quizzes results in PDF of CVS format:
Students can view their quizzes on the frontend:
Final Exams
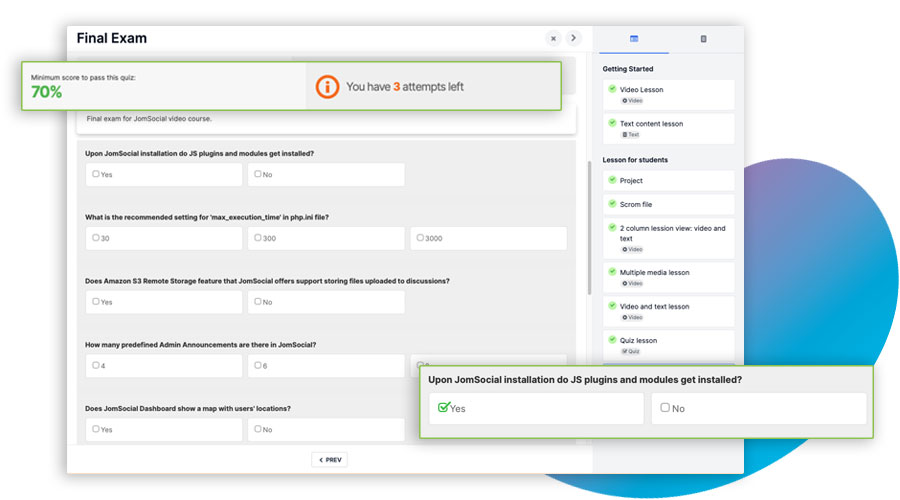
In the same way you can create final exam for courses
- Go to Quizzes Manager, Click New, Choose "Final Exam."
- Give your exam a name and complete the rest of the fields.
- Switch to "Quizzes Included." Click "Add Quizzes.”
- Choose the quizzes to include in the final exam and press “Save.”
- Open Courses Manager and click “Edit” to open the course.
- At the bottom of the General tab, choose the final exam to assign to this course.
- The final exam will show as the last lesson of the last module on the front end and back end table of content.
In Each course you can select a final exam and set the certificate for final exam passing term.
SCORM
What is Scorm?
SCORM (Sharable Content Object Reference Model) is a set of technical standards for eLearning products. It provides the communication method and data models that allow eLearning content and LMSs to work together. It tells programmers how to write code so that what they build will “play well” with other eLearning software. SCORM is the most widely used eLearning standard available.
How SCORM works with GURU?
By integrating SCORM, administrator and teacher can add new scorm ZIP files in any course lesson from back-end and front-end.
Back-end:
We added one panel to manage SCORM files. From back-end, access the Scorm menu item then you can create new scorm file. For each SCORM file, you have to assign it to specific teacher and a course of the teacher. Then the scorm file will be only available to be added in lessons from assigned course.
Here are simple steps to add SCORM file in one lesson course:
- From back-end, go to Guru > Scorm menu item
- Add new scorm file.
- Access the Course management panel, open the course to add lessons with SCORM File.
- Add lesson details (name, level…) and most important select the “Scorm” layout, from General Tab.
- Select “Scorm” button then select a SCORM file from assigned to this course.
- If you don’t have already a scorm file for the course, you can click on “New Scorm” and create a SCORM file for the course and add to the lesson.
- Open the course page in front-end, as a student, and in that course lesson, you can see the Scorm content.
Notes:
- The SCORM file is stored in the directory: site root folder/media/scorm, and the lessons extracted from that zip in this directory: site root/media/scorm/lessons/[LESSON-ID]/[SCORM-ZIP-NAME]
- The saved details for lessons and scrom files is stored in Guru database tables.
See how the feature work in action.
Create SCORM files on front-end:
On front-end, teacher can add SCORM files for lessons for their courses.
- Log in front-end with teacher account.
- Go to teacher dashboard, and there is a new menu item – Scorm.
- Teacher can add/edit/delete scorm files from that page and the scorm files added are available only for that teacher.
- Go to “Courses” page and edit tree for one course.
- Add new lesson or edit a lesson already created.
- From “Layout” tab, select Scorm icon, and then select a scorm file or you can create a new scorm in lesson page.
See how the feature work in action.
Custom Fields
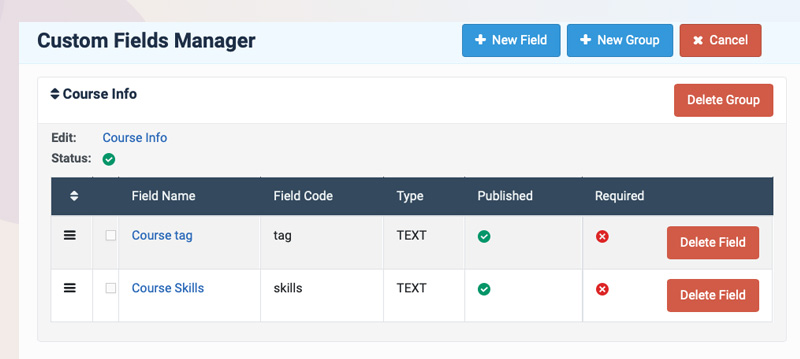
Guru introduced custom fields options that allow admin to add more new fields in the registration form for teachers and students. On the backend a new option is added for the custom fields

How to use custom fields:
Custom fields creation is now very easy. To add a new field, first admin need to login on Joomla backend > Guru > custom fields. There are two options given for custom fields :
Field Group : Fields group must be created first, so you can add custom fields
Field : There are 6 types of custom fields
- Text
- Text area
- Select
- Radio
- Checkbox
- URL
You can add new fields and add any type of the custom fields from selected options.
Once you add custom fields, You need to select them for teachers or Student registration. Guru offers different settings for Teacher and student registration for a better workflow.
For example you want to add the custom field in the student registration form. Navigate to Guru > Student > registration. Select the custom fields you want to show and save.
Checkout the dedicated post for how to custom fields in Guru here:
Custom fields in GuruCertificate

Certificates are important on an LMS to give a valid certifications that approvde student passed the exam.If your potential students know they can get a certificate that will help them get hired or improve their resume, then there is a much better chance that they will sign up for your courses! More students = More cash for you!
Certificate Designs:
Guru comes with 16 beautiful certificate templates you can choose from. You can add your logo to any of the templates and you can even upload your own template, just create a 800x600 px image and upload it.
How to Edit/create Certificates?
Edit or creation a certificate template is easy, Guru comes with pre built certificates template and all you need to do is change the background image to your own organisation. The background image will appear in the Certification.
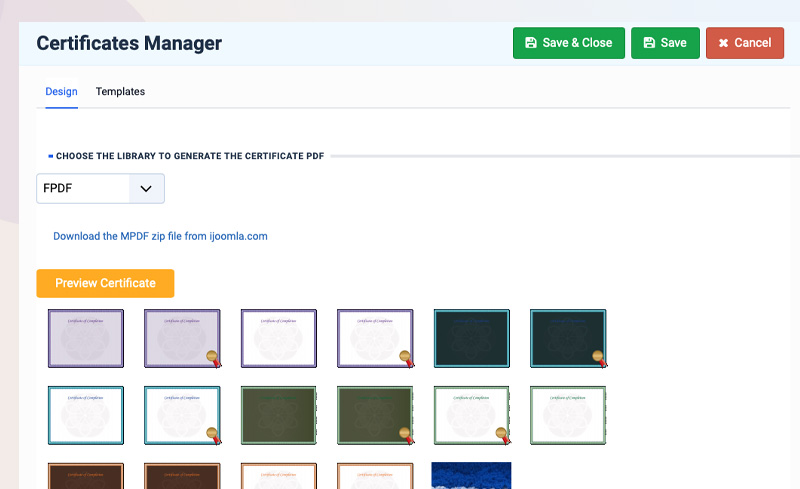
Navigate to Components > Guru > Certificates > Edit the Certificate library to MPDF and PDF. If you are going to use MPDF you must add the library in Helper folder as below:
- Download the MPDF plugin file from this download page: HERE
- Install and enable the plugin
Content and Email templates
Choose what information will show on the certificates (name, course, etc.) Control the content of the email the student gets when he/she is eligible to a certificate
The certificates comes with three options for the users HTML view, PDF and Email certificate that you can edit as per needs. If you want to set custom certificate for each course this can also possible via Edit course options > custom email templates.
List of the supported variables in the Certification templates:
- First name [STUDENT_FIRST_NAME]
- Certificate ID [CERTIFICATE_ID]
- Certificate URL [CERTIFICATE_URL]
- Last name [STUDENT_LAST_NAME]
- Course name [COURSE_NAME]
- Author [AUTHOR_NAME]
- Company [STUDENT_COMPANY]
- Course avg quizzes score [COURSE_AVG_SCORE]
- Site URL [SITEURL]
- Completion Date [COMPLETION_DATE]
- Certificate course message [COURSE_MSG]
- Course final exam score [COURSE_FINAL_SCORE]
- Site name [SITENAME]
Use any of the variables bellow to construct your certificate. Your students will be able to download a PDF file with the certificate and print it. You can also add any images (logo, etc.) to this certificate.
Frontend View:
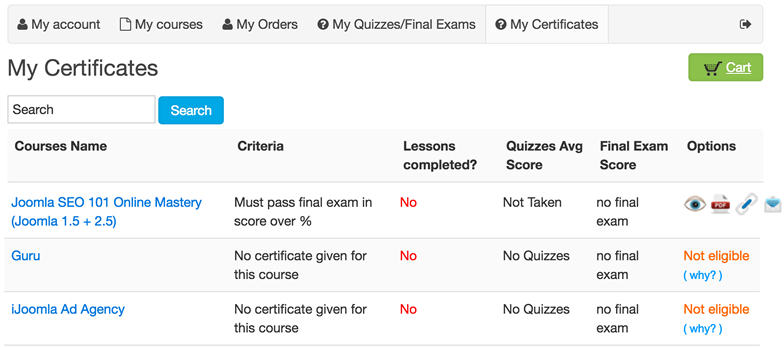
On the frontend if a student passed the example and course term he is eligble for the certification. He can download the certificates from the certificate Tab menu in student dashboard.
Certificate term:
How does Guru know which of the students deserves a certificate? When you create/edit a course, you can choose any of the terms below:
- No certificates
- Completed all the lessons
- Passed the final exam
- Passed the quizzes in avg of x%
- Completed all the lessons and pass the final exam in avg of x%
- Completed all the lessons and pass quizzes in avg of x%
You can the certificate terms from the course Edit information and the course will be issued when the student complete the terms.
Finance settings
The finance settings includes Subscriptions plans, Promo codes, Orders and Payment plugins
Orders settings
The order tab consist the list of Pending and completed order with details invoice and student informations.
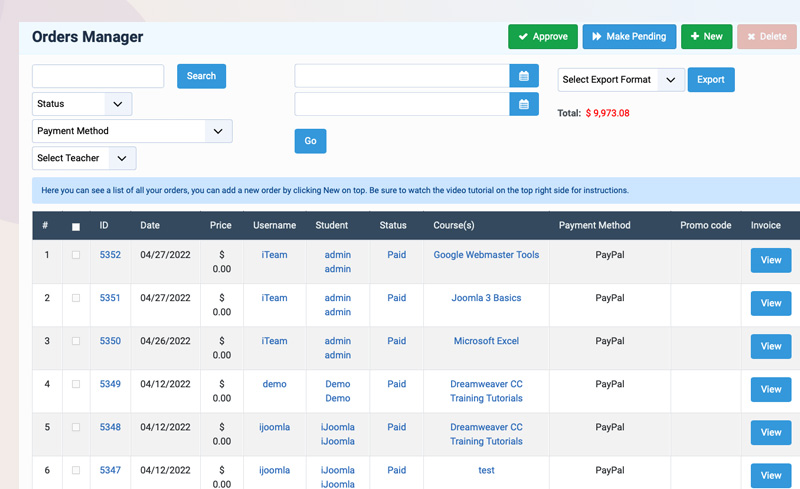
The order tab allow you to Approve a Pending order, delete or add a new order. You can also filter the orders in the tab.
How to add an order?
To add a custom order for an student open > Guru > Finanace > Order > Add New. Select the student type from below options
- Add an order to someone who doesn't exist on the user database
- Add an order to someone who already exists in the user database but is not a student yet
- Add an order to an existing student
Once you select the option for example a student already exist, the system will ask you to submit the username of the student.
Select the Payment type, Promo code and add the course for the specific student.
Promotion codes
The Joomla LMS Promo Codes Manager provides an easy and proven way to promote your online courses. You can give potential students a promotional code that offers a discount for an amount that you define when they purchase.
You Can Manage Your Promo Codes on the Promo Codes Manager:
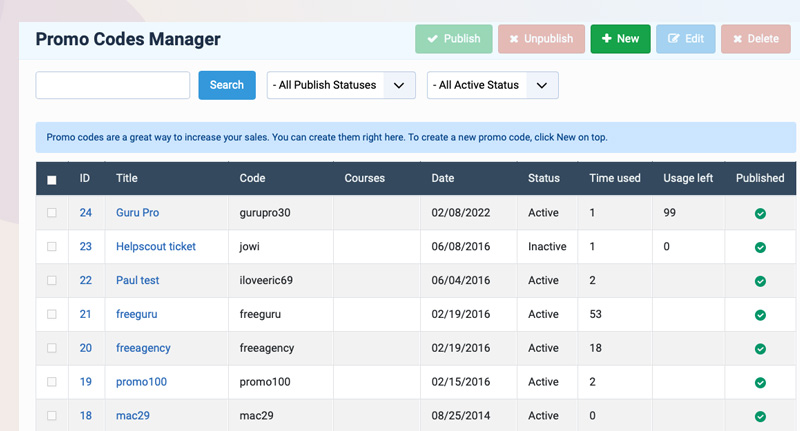
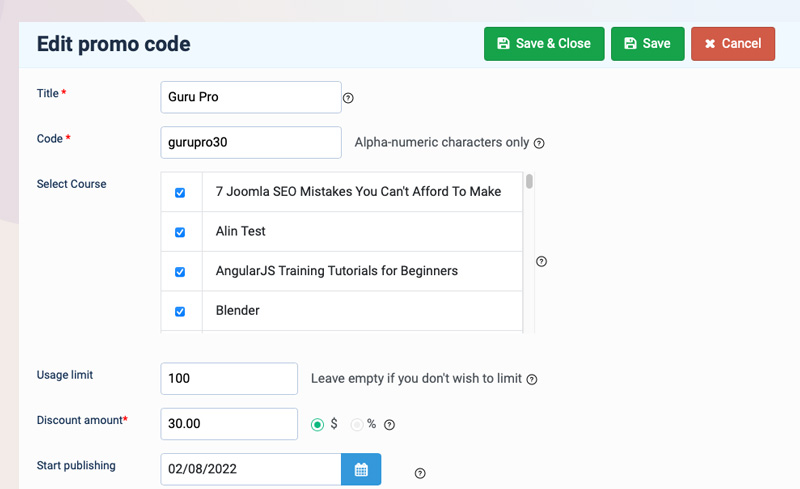
The Add/Edit Promo Code Page Allows You To:
- Enter the title for the promo code.
- Enter the promo code.
- Limit the usage for a set number of students.
- Choose the discount amount based on a fixed price or a percentage.
- Choose the starting date.
- Choose the ending date.
- Choose whether this promo code is for existing students or new leads.
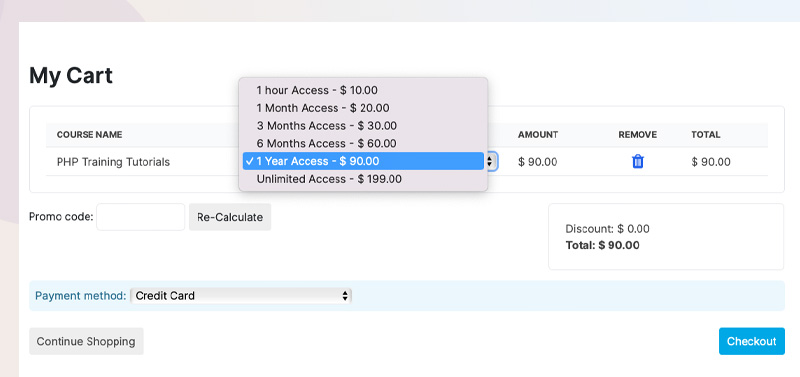
Your Potential Customers Will Be Able to Enter the Promo Code When They Check Out:

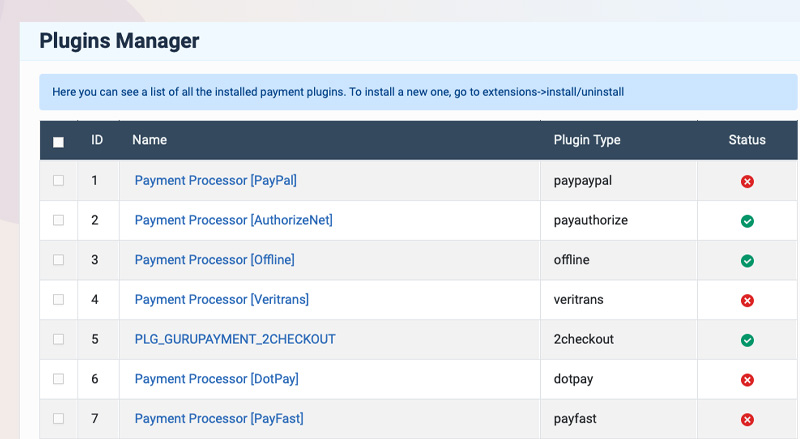
Payment plugin settings

Our Joomla LMS component comes with a few payment plugins. Payment plugins provide access to available payment plugins so you can charge your students in a way that works best for you.
Download the payment plugins HERE and install to your site as normal Joomla extensions:

Then access the Finances > Payment Plugins to enable/disable the payment gateway and configure the required information.
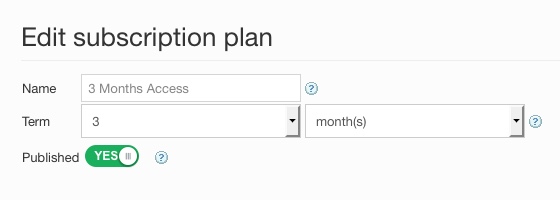
Subscription Plans
Our Joomla eLearning system allows you to set up subscription plans with automated e-mail reminders.
When you’re ready to sell your course, you can set up subscription plans based on time: by hours, days, months and years, or you can create an unlimited subscription plan that doesn’t expire. You can also set e-mail reminders: e-mails that will be sent to subscribers when their plan is about to or has already expired.
These plans and e-mail reminders will be available for you to choose on the course pricing tab. On the front-end, the course page will have the plans on the pricing tab and once the customer checks out, they'll be able to select which plan they want.
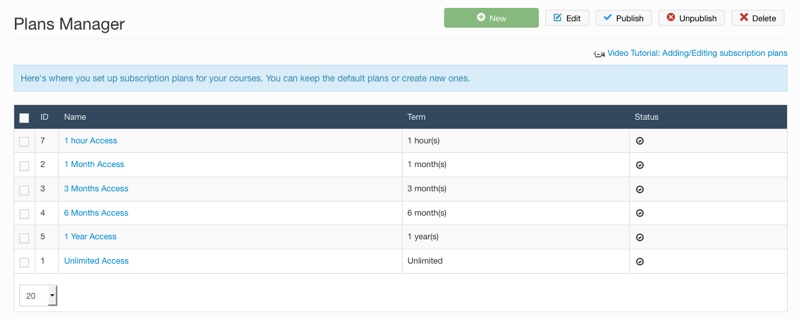
Create Your Subscription Plans:
You Can See All of Your Subscription Plans on the Subscription Plan Manager:
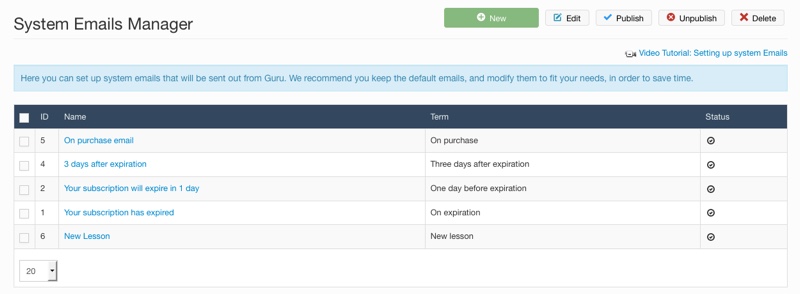
Create Automated E-Mail Reminders:
You Can See All of Your E-Mail Reminders on the E-Mail Reminders Manager:
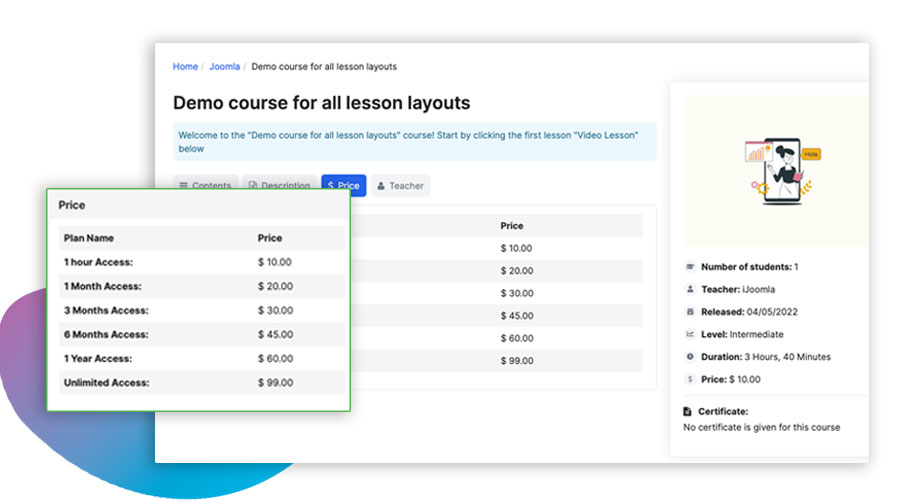
Course Pricing Tab:
- Assign the prices for each plan and the default plan.
- Choose a renewal price for each plan.
- Choose which e-mail reminder to include for the course.
Your Customers Will See the Plans on the Course Pricing Tab:
Your Customers Will Be Able to Choose a Plan When They Check Out:
This Joomla LMS subscription plan allows you to make money from membership to your courses easily!
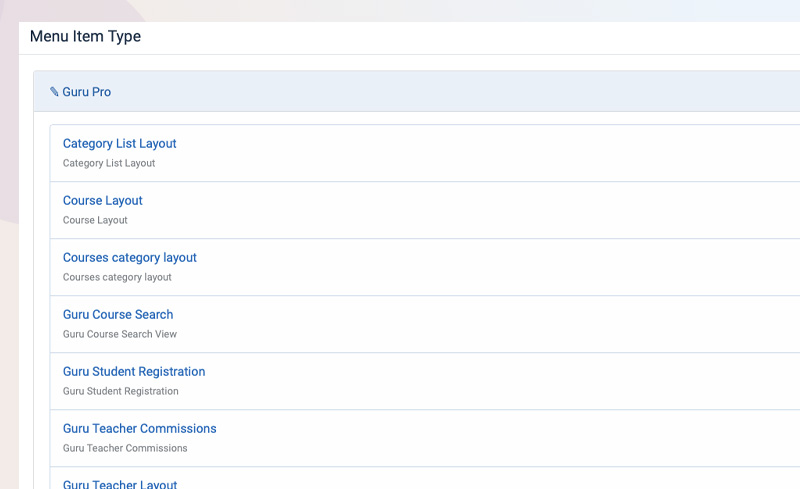
Frontend
Guru Pro gives the option to display Menu items for teachers and Students with frontend interface. There is list of Menu type offer by Guru display Student and Teacher Interface:
- Category List Layout
- Course Layout
- Courses category layout
- Guru Course Search Guru Course Search View
- Guru Student Registration
- Guru Teacher Commissions
- Guru Teacher Layout
- Guru Teacher List
- Guru Teacher Media ayout
- Guru Teacher Media Categories layout
- Guru Teacher My Courses layout
- Guru Teacher Profile layout
- Guru Teacher Quizzes layout
- Guru Teacher Registration
- Guru Teacher's Students layout
- My account layout
- My Cart My Cart
- My certificates layout
- My courses "My courses layout
- My orders My orders layout
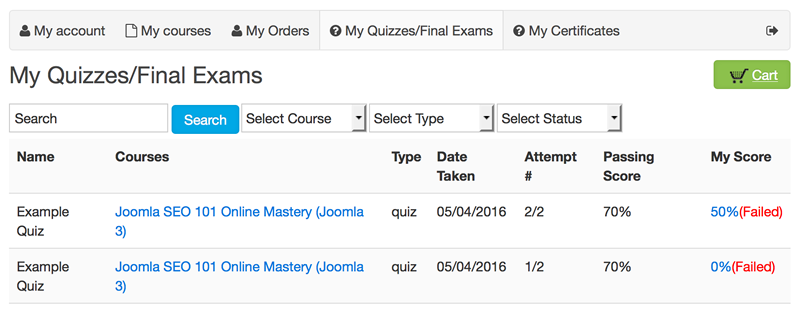
- My Quizzes/Final Exams layout
Student Dashboard:
Student dashboard can include its course and the tabs will appear on the same layout. To create a My course menu for student that will display the courses list subscribed by him Navigate to Menu > Add new menu item > Guru Pro > My course.
Once the menu item is published and student logged in he can view the my courses, order, certificates and profile in the dashboardd
Teachers Interface:
A teacher interface allow the teacher to create and manage course on frontend, grade students check the progress of the students who enrolled the course and more.
To create a teacher Interface menu > add menu item > type > Guru Pro Teacher interface and save it.
Your teachers can prepare whole courses themselves, letting you collect either a percentage of the sales or a set fee. It's up to you.
Teacher Registration Is Easy
Your teachers can register quickly, receive your approval, then start working on their courses right away. You will be notified when a new teacher requires your approval.
Review, Publish, You're Done!
When teachers can prepare their courses without the help of the site's admin, all you need to do is review the course and publish. You'll have all the time you need to promote the course, bring in students and make money!

Teachers Can Create New Quizzes And Add Media
To build a really comprehensive course, teachers will need to be able to add quizzes and media. Teachers can do that by embedding media, linking to it or uploading it directly to your server.
Stats About Students
The teachers' interface also gives teachers stats about their students and full access to quiz results. They can see how well students are doing and receive detailed information that shows which students succeeded where — and where they need to work harder.
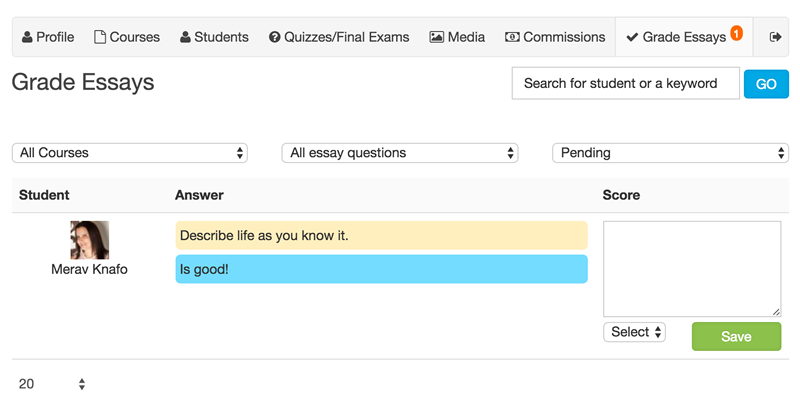
Grade Essays
Teachers can easily grade student's essays and even leave a comment.